Tuesday, January 29, 2013

Packaging & Promotion

I think a lot of artisans think a lot about packaging their product in such a way that it reinforces the theme of their business idea. Let's face it- it's kinda fun! There are certain mainstays in my packaging and promotion- things I always like to have:

This is a pad of sticky notes. It has my logo and website on it, as well as my email address. I've been ordering these for years from VistaPrint. These are new as I recently changed my business name to Dana Evans Studio from StoneAddict Jewelry. I always write a little thank you note on them and stick them on the package I'm sending to a customer.


These button magnets I designed and then ordered on Etsy last Spring and include with all my jewelry orders. They are 2-1/4" in diameter and have a nice magnet on the back- here's a link:


One other thing I've been doing for years is using iron-on transfer paper to create logos on jewelry pouches. I buy muslin pouches from PaperMart.com in a couple of different sizes, then design my logo and print it out as many as will fit on one sheet.
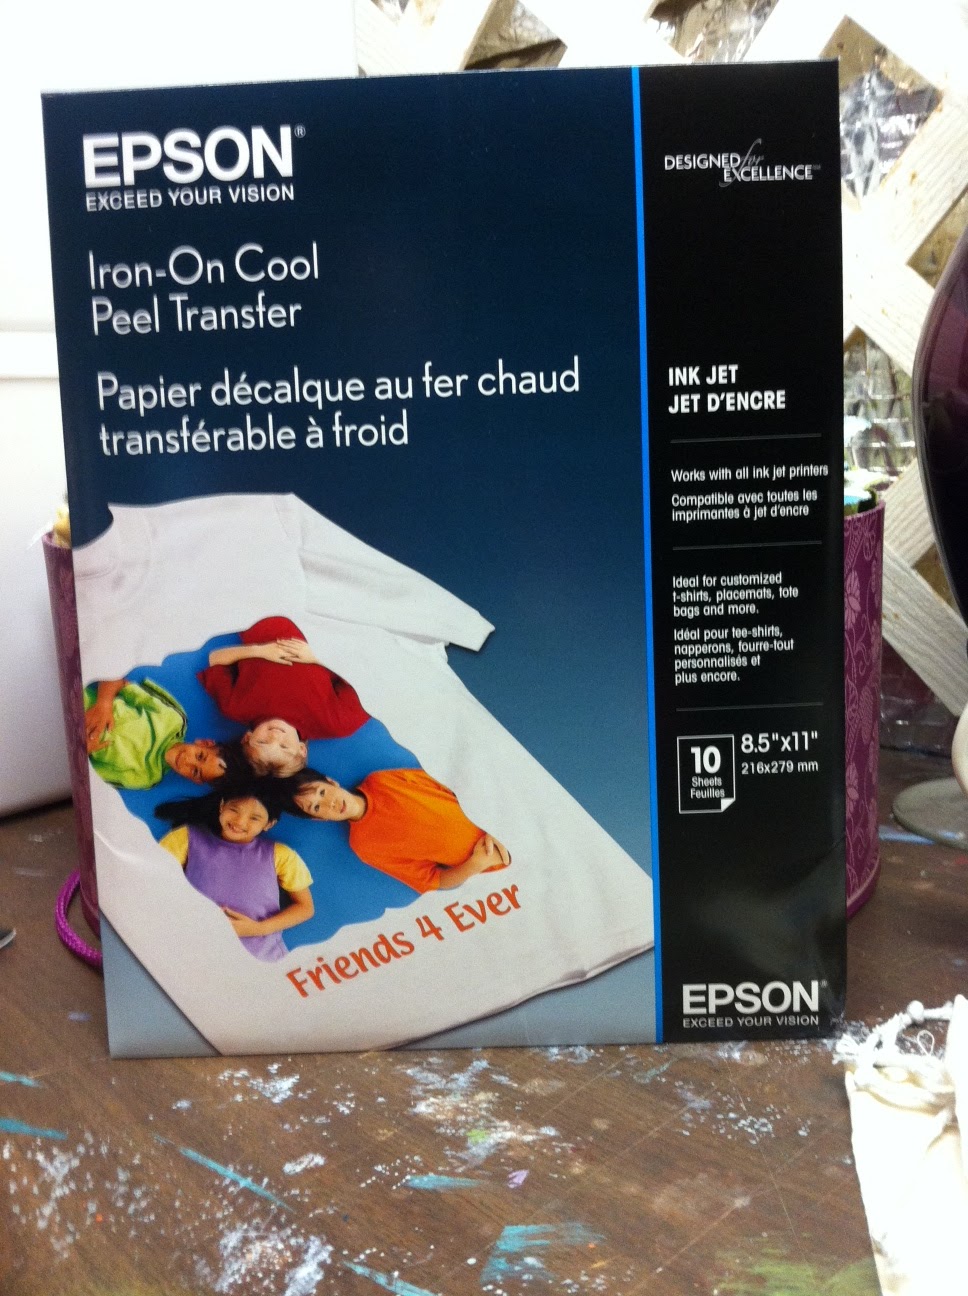


This is the brand I've been using- I got it on Amazon.com but Staples.com also has them. There are many out there! It's only for inkjet printers- and there are specific settings on my print dialogue box for 't-shirt transfer'. Why is that important? See below:


That's right- the printer setting mirrors the image for you, so that when you iron it on, it reads the correct way! Pretty important!! It also signals the printer to create a high-quality print.


So here ya' go... a nice pouch that looks pretty professional. Takes little time to create and it's a nice touch. It has my logo and website, so between the sticky note, button magnet and this, there's no excuse for a customer to forget how to find me!!


The last thing I include in my customer's order is a small piece of polishing cloth. These are the Sunshine brand, and I buy a bulk of 10, then use a pair of serrated fabric scissors to cut each piece into 6 sections. That way, one package yields 60 small pieces- that lasts a long time! It's a small touch but I think customers like them.

In addition, there are SO many other promotional materials available. A quick search on Etsy resulted in a lot of different ideas one could use:


I guess you have to consider your product and what's appropriate. In the dental office my mother works in, they give away free small lip balms, complete with office information on the tube. There are lots of products out there to choose from, and lots of companies to buy from. 

I recently bought a binder from zazzle.com that had my business logo on it. I bought some baseball card inserts and keep pictures of every piece I make in it:


And, of course, there are business cards. With 101 companies out there to make them, the choices are endless. One of my faves is overnightprints.com. They offer rounded corners and a nice thick card.


Thursday, January 17, 2013

New Stuff....

 The winter holidays kept me busy this year; I haven't had much time to create in the last month, but that's changing.... Just as I was getting back to work, I got a message from the editor of Belle Armoire Jewelry Magazine. I guess she was trolling Etsy and found my site. She encouraged me to submit my work to her magazine! Cool!


The only caveat was that they wanted ACTUAL jewelry pieces- no pictures. Hmm...  I get it- they want to photograph everything themselves so the magazine has a consistent look. She said I could be selected for a how-to article or maybe just some 'boutique' pics in their gallery.

Not that I don't relish the idea of seeing my work in print, but my inventory is a bit low right now, and I have a group Ladysmiths show at the end of April- would I get my work back by then?

She assured me my work would be returned in a timely manner, so I thought- I'm going for it! She specifically wanted examples of my granulated pieces as well as the keum-boo (gold foil) pieces, but wanted more of the latter because I had sold actual examples and had only one in hand. So I made a couple more pairs of earrings to illustrate the technique:


I really hope they select my work! I went to the bookstore to take a look at their magazine, and they have A LOT of projects and artists represented. I hope if selected, I can manage to stand out from the crowd! In the end, it's nice to be published in order to add it to my resume and seem more 'credible' as an artist. It's basically a trade magazine, as is Art Jewelry Magazine, in which I had an article in last year, so I can't expect any sales. But last year I did have a reader (also a jewelry-maker) make a large purchase from my stone supply shop, so that's a possibility!! 


The above sheet was what I submitted, along with the actual jewelry pieces (hope they make it there in one piece...) with tags/instructions attached, per their requirements. Cross your fingers for me!

Saturday, December 22, 2012

Do you Moo?

Recently the ladies metalsmith group I meet with regularly had a powerful meeting where we discussed our 'story'. This resulted in me wanting to change the theme of my jewelry business a bit. Instead of StoneAddict Jewelry by Dana Evans, I decided to change my business name to Dana Evans Studio. It was all because, although I LOVE stones, my design sense has strong roots in my architecture training, and some of the ladies could see the structure of my work as me building 'houses for stones'. So, I decided I needed to better encorporate my architecture background into my jewelry work, and the result has kept me busy... new website, new packaging, new image. If you want to see our meeting blog, look here:


If you haven't gotten here from my new website, you can find it here:


I worked hard on it over the last few weeks- hope you like it! So, the next step was packaging. I bunch of my fellow metalsmith ladies love moo.com cards. They are half the height of a regular business card, and you can put any number of images on the front, with business info on the back. 100 cards will run you around $20. I ordered a bunch of business cards, but I also ordered a set that were blank on the back, with a snippet of my logo on the front, with the intention of making tags.


I found this multi-size tag punch on Amazon; I liked the design of the tags and the fact there's 3 sizes.


I figured I could get one small tag and one medium tag punched from each moo card.


Here's my moo card in the medium slot- it's easy to position the card from below, where you can see where the cut will occur, then squeeze to pop out the tag shape.


Once cut out, I use my small hole punch to make a hole for the attachment string.


Here's a collection of tags in progress...


Of course, not one to shy away from a theme, I also found this blue and white baker's twine (one from Anthropologie, one from the local paper store) in which to continue my color theme of blueprint blue & white. I'll also be using this to tie up my items to ship.


Here is the small tag attached to a ring.


I'm easily able to write a short description with price on the back. Voila! Love it!


In addition, Moo was selling these picture frames for around $25. They hold 20 moo cards in various arrangements you decide on. Each card slips into a plastic holder and can be re-arranged, then the acrylic cover goes on, and there are 6 border screws to hold everything together. They come in black or white. I'm thinking I need to buy a little easel, and this will be a great thing to display at our group Ladysmiths show in late April along with my new Moo cards!


So many possibilities.... You can see how each card slips into a plastic holder- looks like a frame around each card. I am lovin' my new moo products...! Next up... designing new earrings cards....

Wednesday, November 28, 2012

Keum Boo

Today I was working on the Korean process of Keum Boo. A customer asked me to re-create a pair of earrings I had made some months ago, so yesterday I constructed the earrings out of sterling and brass wire. Today I needed to apply the gold foil and finish them up. Let me walk you through what's involved with applying gold foil... it is a technique of fusing pure gold to the surface of another metal, in this case sterling.

Celie Fago is a metalsmith that uses a lot of keum boo- she wrote a great instruction book on it if you want to learn more!


Here you can see a picture of the original earrings, plus the components of the new pair- silver ovals rimmed with brass wire, opal cabochons, and what will become the earwires.


In order to fuse the gold to the silver, the silver must not oxidize/darken as I heat it to fusing temperature, or the gold will not adhere. I could've used fine silver to achieve this, but it's easy to do with sterling- if you raise a layer of fine silver to the surface.  You must heat the piece to annealing temperature and quench in pickle 4-6 times. Don't use flux, and use a Sharpie to indicate when annealing temperature has been reached- it will burn off.


Here you can see the pieces right after being annealed. The surface of the silver is frosty, but not dark. That means these pieces are ready for keum boo, having been annealed and pickled about 5 times.


After pickling the pieces, I use a pre-polish disk to clean them up, as well as compress the fine silver layer. Here the piece on the top has been pre-polished, the bottom piece has not.


You need a hot plate capable of heating to at least the 800-900 degrees F. necessary to create fusing between metals. I also use a stainless steel burnisher. You can also use an agate burnisher because some people say the gold foil can stick to the s.s. (after all, it's a metal too), but I've never had that happen.


And you need some heat-proof gloves. From all the burn marks you can see these are really helpful!


Last but not least, you need gold foil! The gold sheets used for gilding are not thick enough- this is a specialty keum boo gold foil sold by Rio Grande. It's better to cut it between the 2 pieces of tissue paper, but it's thick enough to cut plain, too. I like to use different shaped punches, too, for consistent shapes I'd never be able to cut out myself!


Here I've cut out all the triangles needed- I like to put at least 2 layers of foil on the silver for a nice bright look. One layer tends to be a little dim.


I carefully place the triangles exactly where I want them, and then place the whole thing on the hot burner. I leave it there for about a minute without touching it, so it can get up to fusing temperature.


Next I touch the foil to the silver, and if it sticks, it's ready to be rubbed/burnished down. I will often use my tweezers to hold down the piece so it doesn't move as I'm rubbing. I use the back of the burnisher because I don't want to risk scratching off the gold foil- it's very fragile. (sorry for the bad pic- didn't want to melt my camera!)


Here are the pieces after burnishing/fusing and pickling. You can see the marks left from the rubbing process.


Here are the pieces after the pre-polish wheel. It takes out a lot of the scratch/rub marks. The contrast between the gold/silver is not real strong here, so I opt to oxidize/darken the pieces in order to create contrast. Don't use SilverBlack or the like- it will darken everything!


Instead use liver of sulfur- it doesn't darken the gold- only the silver! I heat up some water and use the gel type (it lasts forever!) to mix in a bit of the stinky stuff. A quick dip is all you need.


See the nice contrast? This top piece is fresh out of the liver of sulfur.


And here are the finished earrings! They have a great antique look and the brass outer trim picks up the gold keum boo color nicely. Now to email my customer and tell her they're ready!


Other examples of pieces I've made with keum boo.


Saturday, November 17, 2012

Gem, Mineral & Fossil Show

Today I took my kids to a Gem Mineral and Fossil Show at the local college. I think the Geology Program/Club is the one that hosts the show, and they do a great job of reeling in nerdy rock people like myself.  It's organized by the local rock club, and they ask a number of vendors to participate. 

I've finally had to face the fact that my 3 children just are not into rocks and jewelry like I am. I liked rocks from an early age. I thought most kids did. I guess because I always loved rocks, that easily translated into jewelry, too. But my kids are non-plussed about going to gem and jewelry shows. It's probably time I stop dragging them with me. I think they're holding me up....


This is a large chunk of Vanadinite from an Arizona mine.
I love it because I can make druzy cabs from it. This was an especially good one because the top was relatively flat and the crystal formation was pretty evenly dispersed.  I'm going to use my saw to lop off the bottom bulk of the specimen and then I will divide it into cabochon shapes.


Here is a closer view. Some specimens were very expensive because they featured large, well-defined crystal formations. These crystals are small but very sparkly and perfect for jewelry applications.


My big find for today was this pair of Williamsite serpentine cabochons.  I absolutely fell in LOVE with them. They are from the Lowes Chromite Mine on the Pennsylvania/Maryland border- these were found on the Maryland side. It's also known as the State Line Pit. 


Normally, serpentine is an opaque, olive-colored stone, also called 'new jade'. It is more yellow than these stones but sometimes has black inclusions like these.


But when I saw these, I had no idea what they were. My first guess would've been a dyed stone. I'd never seen color like this in a translucent/transparent stone. I wondered if it was jade. 


The dealer said it'd be hard to find these stones, with this color, clarity and overall quality, anywhere else. I sort of believed him. But then I told him I'd be back, and I did a quick search using my iphone for Williamsite. And that confirmed what the dealer said- these were really special stones.


How can you not fall in love with that apple green color and the graphic sprinkling of black dots?  They were not inexpensive stones, but not outrageous either. I really wanted to buy more! more! more! but my current bank account wouldn't allow it- plus, we're saving for a shopping spree in Tucson in February. The other reason I didn't buy more is because the lapidary they use did not do a great job on this lot of stones. I've bought from this dealer before, and his lapidary's skills are not the best. So, now I'm wondering if I should 'clean them up' a bit before using them.........

Tuesday, November 13, 2012

Nail Stamp Etching- My 15 Minutes of Fame

Don't my nails look pretty?

I bet you didn't know I was so talented when it came to painting my nails!


Boy, I must have teeny tiny little brushes to be able to pull this off, eh?


Okay, truth is, I'm a girl. And, I have 2 girls. So, we like to do our nails. A couple of summers ago, I was trolling Amazon.com and these cool nail plates came up. I immediately bought some because a) my girls and I like pretty designs on our nails b) they were made of stainless steel, so I imagined I could use these on metal to etch, since I already used nail polish as a resist, and c) couldn't I also put them through the rolling mill???

I'm always trying to think outside the box a bit, and when I came up with this idea of using the nail plates to etch on metal, I was pretty sure I had a great idea. I submitted my idea to Art Jewelry magazine, and they agreed. So I wrote an article about it and it was published in the May 2012 issue! Yay! 15 minutes of fame!!!


Here's a little short-cut instruction sheet (above) I put together for my students at the time. The article as published had A LOT more details- if you would like see the article as it was published, email me at danaevans68@verizon.net and I'll send you some pics!

But I think you can get a sense of how these plates work- transfer of images. That's how my nails looked so purty with little effort!! If you do a search on YouTube, you can find plenty of videos of girls showing how they use the nail plates to do their nails.


I used the same technique to create etched plates using some brass texture sheets I bought from Metalliferous in NYC. I used a rubber printer roller to transfer the nail polish from the brass plates to the copper sheets above so I could tackle a larger area.


Another tip that was included in the magazine was about using a laminator to attach PNP sheets to metal. This is a Scotch TL901 I bought on Amazon.com (I love Amazon) for about $30. It had great reviews. My kids also love the laminator, because really, everything looks better laminated, doesn't it?


I would place the piece of PNP to be attached face-down as usual on the metal, and then instead of ironing it, I'd run it through the laminator 8-10 times. The heat from the laminator would melt the toner on the PNP, and the rollers would create just enough pressure for it to stick to the metal. So easy!! Smaller pieces (such as above) could get stuck in the machine, so I'd simply run a piece of paper in first, then stick in my metal piece a few times while the paper was running through. I'd repeat until the metal went through a bunch of times and started to darken on the plastic side, same signs you look for when you're ironing.


I'd even use a piece of paper to catch the hot metal and run it back up to the top of the machine to be run though again- hands never touched it until it completely cooled and PNP was removed. You can see from above that it works great. 

I'm yet to use my nail plates in the rolling mill.....