| |||

Tuesday, June 30, 2015
Spotted Fever...


Tuesday, May 19, 2015
Rock Hunting & Mining- A Moral Debate
When I was a child, I would often walk around the lake near our house with my Dad and brothers. I was always looking for treasure, but due to the fact that the D.C. metro area is not very geologically interesting, I never found many interesting rocks. Perhaps my standards were too high- there was certainly a lot of neutral-colored quartz-type rocks, but I was looking for color, and the most colorful thing I found was old bottle glass. Here's some of my found loot from when I was a kid:

About 8 years ago my husband and I took our children on a road trip, and our ultimate destination was Asheville, North Carolina. We drove a loop that started with a stop at Historic Williamsburg, Busch Gardens, Raleigh-Durham, and finally Asheville. The way back, also really interesting, included Natural Bridge and Luray Caverns, both in Virginia. Up in the mountains of Asheville was Gem Mountain, famous for its aquamarine. Every other day the owners would blow up a section of cliff, and all you had to do was look down to find the dreamy blue rocks. I guess I was a little disappointed that I didn't have to have chisel and hammer in hand to dig for rocks like the pros do, but I did bring home some nice samples without too much work. Here's some of our finds:

I'm loving watching the Prospectors on the Weather Channel- you can catch these fearless folks mining for 'blue' in the Colorado Mountains on the Weather Channel- YouTube has past episodes so you can watch 'em all whenever you want! These people are in caves and other dangerous areas, muddy and dirty, and loving every second. I live vicariously through them and their adventures!
But at the same time I can't help but feel guilty for the rocks I buy and have always bought, for their way out of the earth comes with great environmental impact. It's hard to believe, flying high in an airplane and observing the huge orb that is our planet, that we humans can and have done so much harm. Earth is so big, and we are so small, and the earth's crust is but a wee layer. But it's at that layer that life exists for us landforms. Of the mining we humans do, surface mining/stripping comprises 85%. Underground mining 15%. I'm sure you've heard by now the impact coal mining has on the earth, and on humans. Mining is responsible for erosion, sinkholes, loss of biodiversity, contamination of soil and water, and toxic dumping of waste products. All this very much impacts life on earth, and not in a positive way.
Mining is expensive, too. China controls 95% of all rare earth minerals. This has required a huge investment on their part. Most of the Australian opal mining (close to my heart) is controlled by the Chinese as well- underground mining produces so much more waste than precious material. Once the 'rough' is collected, it is sent to China to be made into cabochons, beads, carvings, etc... and sold on the worldwide market.
The question is, do I continue to purchase mined gems? Do I support the destruction that mining creates? For the moment, I love gems so much that I can't see alternatives. But, there are alternatives. Wanaree Tanner and Steve Tieken have created a business called Sustainable Stones. Wanaree is an artist I took a class from several years ago. She and Steve are both very concerned about the damage mining does to the earth, and have pledged to create art with only found materials. They cut and polish rocks they find laying in river beds and out in the open. No mining, no digging. Check out their website:
http://www.sustainablestones.com/about.html
Here's some Montana agate- found in river beds- this is how it looks when found:

And this is what it looks like when the nodules are sliced open:

Wowzers, eh??
There is an exciting rock found near me- it's called Williamsite. It's probably the most aesthetically-pleasing stone I've heard about that's near me here in the DC metro area. It's mined near the border between Maryland and Pennsylvania, but now the mines are closed. It was accessed via underground caves, and the miner I got this from had to contend with spiders and snakes:

Pretty cool, eh?
It is definitely an issue I think about a lot. Perhaps a move out to Montana for my beloved river-found Montana agate is in order.....
Tuesday, March 24, 2015
A New Product...
I make a lot of spinner rings. A LOT. It is definitely my most popular item. And now that I am wholesaling them, I am making 2, 6, even 9 at a time. I have gotten to where I have the process mapped out to a science. The last thing I do before they ship out to the customer is to glue in the lab opal stones. Yes, glue. I know- it's a dirty word. Truth is, I don't apologize for it. I can't offer these rings at the price I do if I mechanically captured the stones in a channel setting. Much as I'd like to, I've never learned the technique or taken the time to learn it. I tell anyone who asks that they are epoxied into the channel and so far no one has complained. I wouldn't recommend washing dishes with them, but I wouldn't recommend doing that for any jewelry. And if someone doesn't like the idea of them being epoxied in, they obviously don't make a purchase.
Those jewelry artists who do inlay use glue. Sorry to break it to you. And they don't use Elmer's glue, it's an epoxy or another type of kick-butt strong adhesive. The process for me is: mix equal parts of epoxy (goopy stuff in 2 bottles- one's a hardener), mix thoroughly, apply to channel with a toothpick. I actually only do 1/2 the ring circumference at a time because, although the epoxy is quite viscous and would hold the stones in place even if upside down, the epoxy I use cures in 5 minutes, so I'm racing the clock!!! I can only get half the stones in place before the glue starts to set. There is 30-minute epoxy, but honestly I just don't like waiting that long for glue to dry!!

Well, the other issue is that the epoxy dries with a shine, which I find is distracting. I want the stones to shine, not the adhesive. So I went on the hunt for an equally-strong adhesive that had a matte finish. I asked for advice from fellow metalsmiths. Most suggested for my application, to 'chalk' the epoxy while it was curing, to create a matte, frosted look. Chalk does come in all colors, so that seemed reasonable and cheap.
I bought some cheap black sidewalk chalk from Walmart, sanded it into a pile, and dropped some into the drying glue.
Disaster. Maybe it was the cheap stuff, but the chalk bunched up and didn't neatly cover the surface like a fine powder as I hoped. Honestly I didn't want to mess with exploring other ways to achieve the chalked matte look.
Especially because I found this on Amazon:

Wow- no mixing, no drying, no racing against the clock!!! And it's MATTE! Sold!!!! So, the other part to the equation is that this product needed UV light from the sun or an artificial source. I decided to order this UV/black light :

The description said that this type of flashlight could be used in a way much like CSIs (crime scene investigators) do- in a darkened room to find blood spatter on a wall from a homicide! Plus, I could find the old owner's cat pee on the carpet, old spills my kids tried to hide, or bedbugs in hotel room beds!!! SOLD!!!!
Oh, plus it had UV light that could cure my glue. Yeah, that too....
I did tape a warning on it NOT TO LOOK INTO THE LIGHT because the UV rays are harmful to eyes much like the sun is. Didn't want my kids grabbing it and using it, shining it into their faces, etc.. I actually became quite obsessed with using this ALL OVER THE HOUSE, but that's another post... I digress...
I did a couple of tests on scrap metal- I colored each dark (as I do in the channel before I put in the opals) and put a dab of this glue on one piece of silver, and the traditional 2-part epoxy on the other. I applied a half dozen stones to each and let the epoxy cure while I shone the light on the other sample. I was concerned that the UV light would not penetrate through the stones as they are not transparent but translucent, and have some opaqueness in areas. But, to my delight, the UV light DID penetrate and there was no discernible difference between the 2 samples in terms of strength. I tried to remove the stones by force and was able to succeed in pulling some off of both samples. I crushed the cured glues and they both behaved similarly- good hold but fairly brittle.
SO, this afternoon I poured a little bit of the very viscous glue into a plastic cup, and applied it all the way around the channel with a toothpick. I took my time and placed the stones all the way around. Then, I shined the light all around the channel and it set within a minute!
The disappointments to this product are twofold: one, it is quite thick. The bottle says you can place the bottle in hot water and it will become thinner to use. If I have to do 9 rings, this could be a practical way to thin the glue, but if I only have one to do, I really don't want to take the time to heat it up. Two, it really doesn't dry matte- it's pretty glossy. I was able to press my finger into the freshly-cured glue and that softened the gloss a bit, but it was still hard to get into all crevices and any excess glue shined pretty bright, which I don't like.
But considering the ease of use, even with the disappointments I think it's a good product and will continue to use it. I am hopeful that it will not yellow with time, but that's a quality even epoxy is guilty of. I can recommend this product if you are looking for a clear, viscous, highly-adhesive glue that cures quickly and can be used for holding translucent items.
Tuesday, January 20, 2015
Trade Show Wrap-Up
So yesterday ended my first trade show experience. I am SO glad I participated in the American Made Show! It was not a financial success for me, but the amount I learned made it well worth it. I'll go through why I think it wasn't successful for me, what the costs were, what features were important, and what I learned. But first, if you want to read the first post about the move-in, here is a link to that post:
http://www.stoneaddictblog.blogspot.com/2015/01/trade-show-move-in-done.html


http://www.stoneaddictblog.blogspot.com/2015/01/trade-show-move-in-done.html
This is a snapshot from our booth. I was sharing a booth with 3 other people, also new to wholesale and trade shows, so that it would be less scary for all of us. We represented the Washington Guild of Goldsmiths (WGG) and we had a 10' deep by 20' long booth. Each of us had a 2'x4' table, which truthfully was not a lot of real estate. We met many times to discuss presenting a united booth, and I think we achieved that. However, even though the WGG name added some credibility to our booth, I do think there were 2 issues with sharing a booth: a) no strong identity for each one of us that our own booth would've provided, and b) buyers may have shied away from a group booth. Of course we have no way of knowing what goes through a buyer's mind, but it IS important to think like a buyer when thinking about booth layout.
Doing a trade show gave us the unique experience of talking with other vendors. Many feel like the $300 difference in buying a corner booth is well worth it. If I do another show, I will suck it up and likely buy my own booth, on a corner (perhaps next to a friend, though!) There were many artist vendors there by themselves, and unfortunately it did not seem like the show staff provided booth sitters. It is up to the artist to bring along a helper so that they may take breaks, get food, use the restroom, etc... and of course it's nice to have someone to talk to and help with setup/breakdown. The cost of a corner booth may cost $2500. Add that to airfare (if required) and hotel (if required) and you see how expensive it is to do these shows. We were fortunate to be local! The vendor next to us told us they spent $7000 to participate in this show. Which meant they needed to write $14,000 in orders just to break even. Fortunately they told us they make their living doing shows (wholesale + retail) so hopefully they did better than that. It was a slow show due to the change of city, name and date, so many vendors reported slow returns. This is part of why I may not have done as well as I could've.
There were over 200 jewelry vendors. Many of the buyers had a glazed look on their faces- that is a lot of jewelry to look though, and after a while, I imagine it all starts to look alike. Having a booth and a product that are memorable is very important! Anything a vendor can do to stand out certainly seemed to make a difference at this show. The vendor across from us was trained as a fine art photographer but now sells jewelry with cute cartoony/graphic animals and he does very well, makes his living by supplying 150 stores! I asked if he ever imagined he'd be doing this, and he shook his head no and laughed. But he's earning a nice living and has 3 employees, and has obviously found a niche that works. Another vendor told me there are 2 ways to go: you can sell what you love making, or you can discover what sells. I'd like to think that many can achieve both...
I had to really force myself to say hello to buyers (which wasn't too hard) and to tell them a bit about my jewelry. This was more challenging for me!!! I am not so good at talking about my work. But I was determined to try, so I practiced a line, "This collection is based on the technique of ancient Etruscan granulation." It did seem to interest buyers a bit more than just saying hi. If they took a few seconds to look, then I pointed out my best seller opal spinner ring and talked about that for a few more seconds. My impression was that buyers know pretty quick by looking at the items and the price points and decide to linger a bit more or move on. We overheard one buyer say, "I have to remember that I'm not buying for myself." Buyers are concentrating on what will work in their store and will sell.
I did have a good friend come visit and help me out and she thought my work was lovely, display was nice, etc... but felt my display needed a focal point. She suggested a one-of-a-kind stellar piece displayed prominently, because as it was, the display to her looked 'too even' and didn't catch enough of the buyer's attention in the first second or two they are making judgements about each artists' work. For a lawyer she made a really good point!!!! In my defense I did try to create a dynamic display with different levels so the eye would move around. I kept it simple so the jewelry would be the star. We raised our tables up but they could've been higher.
What we needed to have:
- postcards or business cards (preferably blank on the back so the buyer could write notes) with booth number in case they wanted to come back
- line sheets (we were told 100 but I only gave out a few!!!) with the booth number
- order forms preferably in duplicate so you can give the buyer a copy
- postcards with jewelry pictures on front and booth number on the back for our friends and loved ones to give out to potential buyers roaming the aisles
The nice thing about these shows is that the buyer's name, business, and city are listed on their badge for you to look at. So, if a store buyer comes by you're interested in talking to, you can put on your best.
Here's a look from behind my booth. It helps to have office supplies, cash, water, snacks, etc... and I was able to store stuff like that under my table. I also had a little tray table for putting my stuff on. I did bring a tall stool to sit on once in a while but it is better to stand. Standing next to the table or out in the aisle is also nice so there's not that distance between you and a buyer.
I talked with one of my stockists before the show and she told me she never even looks at a vendor unless they have a banner of their work hanging in their booth (pictures of jewelry and pictures of the jewelry on a model are both nice to have), the display is well-lit, and the prices are well-marked. I think we accomplished all of those items. She does this so that the vendor she sees have a certain minimum of professionalism. We were also in the back of the hall. Because it was a slow show, one vendor told me that the fact that she was in the front of the hall was her saving grace. So that's something to keep in mind too for future shows. Buyers get tired very easily and by the time they reached us in the back of the hall many looked like they wanted to pass on by us.
The banners I did- each of us had professional photographers snap the photos, then I overlaid text and sent them to VistaPrint. I also had to buy the poster hangers so they would lay nice. We had to provide all the lighting, and lighting the banners was just as important as lighting our jewelry. Track light kits were not expensive (a set and 4 lights $45) but we had to get a power pack that could be inserted into the end that had a plug. We had lots of extension cords and a couple of power strips for more outlets. We were capped at 1000 watts of electrical per 10'x10' booth, so we could have plenty of lights. In a typical 10'x10' booth, with typical 50 w bulbs, that means 20 lights per booth. It's a fine amount for most people.
Beyond this we had to provide a floor cover. The Rosen Group contracts with Hargrove (a show contractor) to provide aisle carpeting and other equipment, and Hargrove offers many services and products to exhibitors. We could've rented our displays and lighting from them, and they would've installed them for us (for a price!). As it was, we did pay them to install carpeting because we didn't know how to reasonably cover 200sf of flooring ourselves and for a reasonable cost.
When it came to breakdown, we were able to get out fast. It is helpful to have a hand-truck, as well as pack in those recyclable grocery bags or even a rolling suitcase. We piled bag after bag over our shoulders, with my dad dragging a hand-truck with our tables, and walked right to our car for move-out! Didn't have to use the loading dock, which was a huge time-saver. Of course, the more intricate the booth, the more trips it would take. We did it in one trip!!!! Yay us! Some vendors creatively used cardboard or specialty folding accordion paper for tables, which were foldable, light, and packed up in no time:
It's a good thing jewelry is small, if we had been potters it would've taken much longer!
All of these items added up to an expensive show, and we didn't even pay full price for the booth, because as a guild we got a discount.
What I learned was that an artist may have to do a show several times before a buyer will decide to take a chance on ordering. The buyer needs to know that the artist is a serious and dedicated professional. It is important to have a cohesive collection so that a buyer can instantly size-up your work. Display is important, but it sometimes is a fine line between standing out because of your display and standing out because of your jewelry. Some of the busiest jewelers were the ones who just rolled out brown paper across a table, placed each of their items on it, and listed the price in pencil next to each. Other booths were dynamic and brought buyers in that way. We heard one buyer exclaim "If I see another circle I'm gonna throw up." Again, there's a fine line sometimes between being trendy and standing out. It's a risk to stand out too much and not follow trends! How do you know if you'll sell? On the other hand, if you're too trendy, you run the risk of looking like everyone else.
Such a balancing act, eh?
I'm looking forward to seeing where my journey takes me. I'm so glad I did this show. It was completely out of my comfort zone and I'm proud of myself for trying it. I'm sure I left out a lot of information we gleaned but this was the bulk of what I got out of it!! Thanks for reading!
Wednesday, January 14, 2015
Trade Show Move-in: DONE!
So today was the move-in day for our booth at the American Made Show in Washington D.C. at the Convention Center. I am trying to wholesale my jewelry, so last year, while taking a workshop at an ABI (Arts Business Institute) sponsored local event, my friend Bodil Lund and I were talking with fellow Washington Guild of Goldsmith member Estelle Vernon, who suggested we may be able to have a guild booth at this show (Bodil is Treasurer and Estelle is also an active member). Along with Ann Carney, the 4 of us committed to spending many, many hours creating, planning, and selling at this trade show Jan. 14-19th. This follows a 6-week online class that Bodil and I took on wholesaling jewelry, called the Flourish & Thrive Academy, which was instrumental in helping us figure out how to enter into wholesale. Because we are a guild booth, we saved a lot of money on booth fees, which made doing the show do-able. In a future post I will outline the other (sometimes hidden) costs of doing a trade show, as well as the items we had to have.

Over the course of many meetings, the 4 of us decided on the above layout for our tables (in a 10'x20' space), lights, banners, etc... Each of us was to have a 2'x4' table, and a professional-looking banner with a sample of our work hanging behind our table. We also wanted great lighting and white displays. We asked many questions of the Rosen Group to make sure we knew what we were in for.
We were instructed to arrive at RFK stadium, which was serving as a marshaling yard, at our appointed time. Signage was bad; we drove around the entire stadium before asking an attendant where to go. She gave us complicated directions and we got lost. Finally, coming from a different direction, we saw a lone sign directing us to an empty parking lot off the stadium. We drove around looking for more signs (silly us) and saw a small trailer which wound up being the place to check in. Bodil walked in and was greeted by a Hargrove staff member (the contracting company) who was complaining that everyone was complaining about getting lost and that it wasn't her fault. We got a dashboard pass and were told to drive to the Convention center. The reason they do this is that the convention center, being a city location, does not have the room for a long line of cars waiting to unload. So, they have cars first go to this marshaling yard, and you wait in line until the people at the loading dock radio in to say there's room for a few more cars to wait in line. Then you drive over and wait some more...
20 minutes later we arrived at the Convention center without getting lost, and found the loading dock after asking one attendant.
Entering the loading dock of the D.C. Convention Center was like entering the bowels of this enormous 3-block building- an amazing sight. Dozens and dozens of loading areas off a 1/4-mile long platform. We waited in line and were told to unload at Bay 30. The fumes were pretty strong from all the vehicles. We started off to the ramp several bays over with our hand-truck and other items we were hand-carrying, and a fellow exhibitor said, "Get a skid box- you'll be done in 5 minutes!" Fortunately an operator was nearby and when we asked her what a skid box was, she offered to come help us. She put a piece of cardboard and unfolded the walls of a heavy cardboard box on top of a pallet. It took us 4 minutes to load the entire contents of our van (3 of us were packed in) into this big box. I then parked the car and the operator used a small forklift vehicle to whip our stuff up the ramp and into Hall B, booth #1332. Within a few minutes it was all unpacked! NICE! Didn't need a hand-truck after all!
I found plenty of 2-hour spots right outside the convention center to park my car, and even downloaded the ParkMobile app to pay for my spot online! I was automatically texted when my time was almost up, and was even able to pay for 2 more hours right from my cell phone!! How cool is technology!!???

We had arranged to have the contracting company, Hargrove, install carpet for us, which was required. We then set to work... first off we grabbed an upright pole and 4 crossbars in order to attach our lights to. This took some fooling with but we finally got it feeling pretty stable. There is some give and flexibility with these metal systems and once we got the correct sized pieces it was not hard at all to create the configuration we wanted. We had 2 crossbars at the front for our table lighting, and 2 crossbars in the back to light our banners. All the bars are adjustable so we were able to get the specific lengths we needed.
We then cable-tied all of our track lighting to the crossbars and attached the lights. It took a while to do this and make sure everything was working. We had plenty of extension cords and power strips. We also cable-tied all the cords neatly around the poles and down to the power sources on the floor behind us. We found that Estelle's MR16 bulbs were seemingly brighter and a more truer color than the track & light systems that Bodil and Ann bought- which were warmer in color. I went to lightbulbsdirect.com to try to figure out the differences between the 2 bulbs- the first are the Solux that Estelle and I are using, and the second is what I'm guessing came in the kits (one 4' track and 4 lights for $45 from Lowe's) that Bodil and Ann bought:
Solux: 3500 to 4700K; 35 or 50 watts (12 volts), 10, 17, 24, and 36 degree beam spread avail., 4000 hours of life, $8 each
Economy: 2800 K, 20-70 watts (12 v), 12-60 degree beam spread avail., 2000 hours of life, $1.50 each (for the 50w type)
It seemed the major difference between the 2 was the color of the light of the bulbs, which seemed brighter with the Solux bulbs. I believe both types of bulbs are 50 watts, but I will confirm that tomorrow!
We hung the banners from s-hooks, and arranged lights on them. We got them done by VistaPrint when they were having a sale so they were very reasonable- only $18 for a 2.5'x4' banner! We also had to buy poster hangers so they would be weighted and have something to hang from- found on Amazon for $18.00.
Next it was an easy job to put table covers (custom made 24x48x36 for $56 by TableSkirtingClip.com) and our display items on top. Tomorrow: jewelry!
As we walked around leaving, we noticed a huge variety of displays. Some were very expensive custom-made installations. Others were simple. For jewelry, it's nice to go even higher with tables at 42"- bar height. No bending over to see jewelry.
Here's the follow-up post on how things went and what I learned:
Saturday, December 13, 2014
Holiday Goings-On
The holidays 2014 are here and I've been busy with this and that.... here's an update of what I've been doing... not rocket science but making strides....
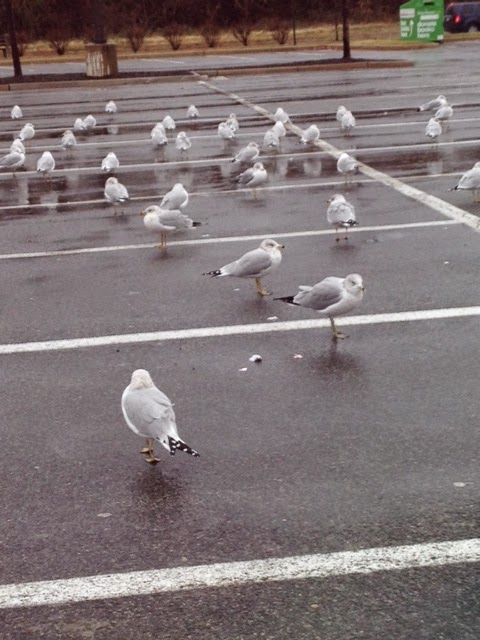
These birds were right outside my parked car when I went to mail some holiday gifts. A little rain on the parking lot and they think it's the beach! Been busy shopping for the holidays... always a busy and challenging time of year but also festive...

This was a drawing my artist daughter Sydney did for Thanksgiving. Yes, a little weird, but that's a teenager for ya'.... she definitely has her own sense of humor. Apparently all my kids do because my other daughter thought this was hysterical too... I'm a bit clueless, but then I'm middle aged, out of touch and 'old'....

Yes, my husband has a beard, and yes, he remarked that bacon-scented beard oil would be a great holiday gift!!!

This is my threesome making weird faces at the intermission of the Nutcracker last weekend. They really enjoyed the ballet- more than they thought they would considering there were no words spoken.

And yes, I have been making jewelry.... this piece was photographed for a customer in Indiana. She owns a store there and requested that this piece, normally a pair of earrings, be made into a pendant. She also requested that the white chain be oxidized, a change that I liked so much that I'm going to oxidize ALL my white chain. Really makes it pop. Just goes to show you that sometimes customers come up with great ideas you haven't ever thought of!! It's great to get feedback...

In addition, my spinner ring made it into the Boutique section of Belle Armoire Jewelry for their Winter 2014 issue. It also contains abbreviated instructions on how to make these rings. If, however, YOU would like full instructions, please email me and I will send them to you!

These are some recent one-of-a-kind earrings I made. I cracked one of the stones when I set them, so until I can repair or replace the stone (opal) they are MINE. Bwah ha ha ha ha!!!! (in fact, I'm wearing them right now!)

I am also getting ready for the trade show I'm doing in one month- it's local, thankfully, at the D.C. Convention Center Jan. 16-19. It's called the American Made Show put on by the Rosen Group. Used to be in Philly and called the Buyer's Market. I had these custom necklace busts made and also am working on ring and earrings displays. Don't worry- you'll get a FULL REPORT of this show with lots of pictures in the week after I get back!
Happy holidays everyone!!
Wednesday, October 15, 2014
Opal Chandelier Earrings- Same/Different
The last few months have been busy with building my wholesale business. I've had some good things happen- gotten into one of my 'dream' stores, and I signed up for the online wholesale site WholesaleCrafts.com. In the meantime, the holidays are coming up, and many retailers are pretty well-set with holiday merchandise. So my marketing efforts have slowed down a bit, and I'm preparing for my first trade show in January, as well as building my inventory of one-of-a-kind pieces to sell myself for the holiday season.
I always love making multi-gem earrings. The challenge in them, especially for earrings, is to make them well-balanced in terms of color (esp. true for opals), and making them exactly the same. I think this pair succeeds pretty well, but I'll walk you through the process so you can see the highs and lows of what went into making them....

This pair followed my typical multi-gem structure: a smaller piece at the top which is soldered onto the earwire, from which hangs a larger piece or pieces below.

I only did a couple of sketches before I was happy with the combination and composition. Since I already had a good idea of which stones I wanted to use, it was mostly the bottom piece that I needed to design. I love using all my little stones- I can't even remember where I bought many of these small stones- probably in a mixed-stone packet. I tried to use up as many regularly-sized shapes and intersperse other combinations. I successfully cleared out 3 categories of stones- so it was a good way to use them up!

Here are the stones I took out to use- the 2 large stones were the most alike of that size in terms of color and shape. I was able to use up all 8 oval cabochons I had as well as the 2 matching marquis stones. The 2 sets of 4 stones at the top were part of a parcel of many stones in which these stones were markedly darker/warmer in body color. I thought they'd contrast nicely with the cooler/whiter collection of other stones. Of course, if you notice, when you put opals on top of white, there's not a lot of color or fire visible. That's why a lot of settings are darkened before the opals are set- the darkness shows off the color and fire much better than white.

I used pre-made bezel cups for the round stones at top. Then I made the bezels for the 2 largest stones.

Since I had 8 oval stones to bezel-set, I measured one and copied the measurements to the remaining 7 lengths required. Saves time to batch-make bezels.

I lined up the ends of each length of bezel wire, straight on. I never solder bezel ends together unless they meet face on- that's why these are D-shaped. The straight edge is where the seam is. I put a small piece of solder under each seam, fluxed and heated until the solder flowed, then I pickled, dried, and formed the shapes into ovals to match the stones' shape.

Next the marquis-shaped bezels were made, and now all are complete- whew!

Once the bezels are made, I can then create a template for which to cut out sheet silver to create the base of each piece. It's important to create the bezels first so I can create templates that are exactly the size I need. I fold the paper in half and cut, so as to create a perfectly symmetrical pattern. I made a few before I was happy with how the stones were placed in the space.

The next part was more straightforward- I traced the pattern onto silver, cut out and sanded the pieces, then laid out the bezels and decorative coins (hammered granules) so that the pieces matched as well as possible. I fused them since this was Argentium, soldered the earwire to the back of the top piece, pickled, oxidized, and buffed.
Then the stone-setting! This is a nerve-wracking part of the process for me, especially with so many stones to set- 20!
I got in the groove and kept hammering and hammering... difficulties arose, as they often do. One of the larger stones didn't fit well into its bezel after fusing, so I had to grind it down a bit on one edge. Then, one of the bezels got a little distorted and it was hard to hammer it back into a decent shape. Another stone didn't sit as flat in it's setting, especially as I was hammering it lightly closed. And, because sometimes I tend to rush too much to get to the finish line, I didn't necessarily spend enough time fine-tuning my settings before stone setting. You people who read my blog regularly know I have my faults!!!!!
Setting stones so small in bezels is challenging- also because they are close together. Clearances are tight. It's also more challenging to clean them up afterward. And because the stones are small and thin, closing bezels always makes me afraid of cracking a stone.
In the end, they may not be perfect, but they have gorgeous stones, great design, and will last a long time in someone's jewelry box! I am ALWAYS tempted to keep these opal chandelier earrings whenever I make them, because they have so much character & personality going for them.

Subscribe to:
Posts (Atom)