Saturday, December 13, 2014

Holiday Goings-On

The holidays 2014 are here and I've been busy with this and that.... here's an update of what I've been doing... not rocket science but making strides....

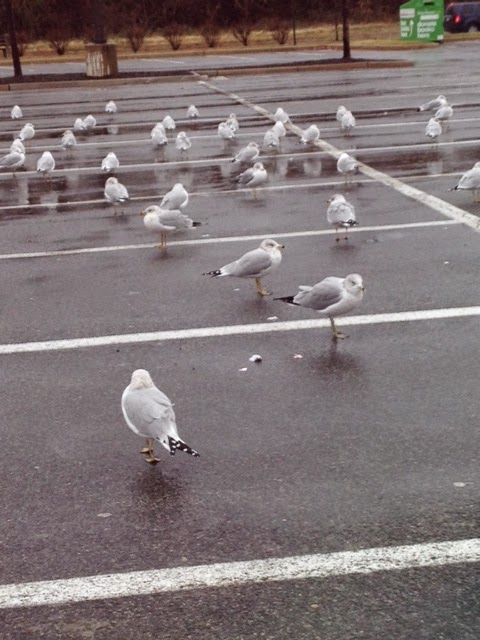
These birds were right outside my parked car when I went to mail some holiday gifts. A little rain on the parking lot and they think it's the beach! Been busy shopping for the holidays... always a busy and challenging time of year but also festive...


This was a drawing my artist daughter Sydney did for Thanksgiving. Yes, a little weird, but that's a teenager for ya'.... she definitely has her own sense of humor. Apparently all my kids do because my other daughter thought this was hysterical too...  I'm a bit clueless, but then I'm middle aged, out of touch and 'old'....


Yes, my husband has a beard, and yes, he remarked that bacon-scented beard oil would be a great holiday gift!!!


This is my threesome making weird faces at the intermission of the Nutcracker last weekend. They really enjoyed the ballet- more than they thought they would considering there were no words spoken. 


And yes, I have been making jewelry.... this piece was photographed for a customer in Indiana. She owns a store there and requested that this piece, normally a pair of earrings, be made into a pendant. She also requested that the white chain be oxidized, a change that I liked so much that I'm going to oxidize ALL my white chain. Really makes it pop. Just goes to show you that sometimes customers come up with great ideas you haven't ever thought of!! It's great to get feedback...


In addition, my spinner ring made it into the Boutique section of Belle Armoire Jewelry for their Winter 2014 issue. It also contains abbreviated instructions on how to make these rings. If, however, YOU would like full instructions, please email me and I will send them to you!


These are some recent one-of-a-kind earrings I made. I cracked one of the stones when I set them, so until I can repair or replace the stone (opal) they are MINE. Bwah ha ha ha ha!!!! (in fact, I'm wearing them right now!)


I am also getting ready for the trade show I'm doing in one month- it's local, thankfully, at the D.C. Convention Center Jan. 16-19. It's called the American Made Show put on by the Rosen Group. Used to be in Philly and called the Buyer's Market. I had these custom necklace busts made and also am working on ring and earrings displays. Don't worry- you'll get a FULL REPORT of this show with lots of pictures in the week after I get back!

Happy holidays everyone!!

Wednesday, October 15, 2014

Opal Chandelier Earrings- Same/Different

The last few months have been busy with building my wholesale business. I've had some good things happen- gotten into one of my 'dream' stores, and I signed up for the online wholesale site WholesaleCrafts.com. In the meantime, the holidays are coming up, and many retailers are pretty well-set with holiday merchandise. So my marketing efforts have slowed down a bit, and I'm preparing for my first trade show in January, as well as building my inventory of one-of-a-kind pieces to sell myself for the holiday season. 

I always love making multi-gem earrings. The challenge in them, especially for earrings, is to make them well-balanced in terms of color (esp. true for opals), and making them exactly the same. I think this pair succeeds pretty well, but I'll walk you through the process so you can see the highs and lows of what went into making them....

This pair followed my typical multi-gem structure: a smaller piece at the top which is soldered onto the earwire, from which hangs a larger piece or pieces below.


I only did a couple of sketches before I was happy with the combination and composition. Since I already had a good idea of which stones I wanted to use, it was mostly the bottom piece that I needed to design. I love using all my little stones- I can't even remember where I bought many of these small stones- probably in a mixed-stone packet. I tried to use up as many regularly-sized shapes and intersperse other combinations. I successfully cleared out 3 categories of stones- so it was a good way to use them up!


Here are the stones I took out to use- the 2 large stones were the most alike of that size in terms of color and shape. I was able to use up all 8 oval cabochons I had as well as the 2 matching marquis stones. The 2 sets of 4 stones at the top were part of a parcel of many stones in which these stones were markedly darker/warmer in body color. I thought they'd contrast nicely with the cooler/whiter collection of other stones. Of course, if you notice, when you put opals on top of white, there's not a lot of color or fire visible. That's why a lot of settings are darkened before the opals are set- the darkness shows off the color and fire much better than white.


I used pre-made bezel cups for the round stones at top. Then I made the bezels for the 2 largest stones.


Since I had 8 oval stones to bezel-set, I measured one and copied the measurements to the remaining 7 lengths required. Saves time to batch-make bezels.  


I lined up the ends of each length of bezel wire, straight on.  I never solder bezel ends together unless they meet face on- that's why these are D-shaped. The straight edge is where the seam is. I put a small piece of solder under each seam, fluxed and heated until the solder flowed, then I pickled, dried, and formed the shapes into ovals to match the stones' shape.


Next the marquis-shaped bezels were made, and now all are complete- whew! 


Once the bezels are made, I can then create a template for which to cut out sheet silver to create the base of each piece. It's important to create the bezels first so I can create templates that are exactly the size I need. I fold the paper in half and cut, so as to create a perfectly symmetrical pattern. I made a few before I was happy with how the stones were placed in the space.


The next part was more straightforward- I traced the pattern onto silver, cut out and sanded the pieces, then laid out the bezels and decorative coins (hammered granules) so that the pieces matched as well as possible. I fused them since this was Argentium, soldered the earwire to the back of the top piece, pickled, oxidized, and buffed.

Then the stone-setting! This is a nerve-wracking part of the process for me, especially with so many stones to set- 20!

I got in the groove and kept hammering and hammering... difficulties arose, as they often do. One of the larger stones didn't fit well into its bezel after fusing, so I had to grind it down a bit on one edge. Then, one of the bezels got a little distorted and it was hard to hammer it back into a decent shape. Another stone didn't sit as flat in it's setting, especially as I was hammering it lightly closed. And, because sometimes I tend to rush too much to get to the finish line, I didn't necessarily spend enough time fine-tuning my settings before stone setting. You people who read my blog regularly know I have my faults!!!!!

Setting stones so small in bezels is challenging- also because they are close together. Clearances are tight. It's also more challenging to clean them up afterward. And because the stones are small and thin, closing bezels always makes me afraid of cracking a stone.

In the end, they may not be perfect, but they have gorgeous stones, great design, and will last a long time in someone's jewelry box! I am ALWAYS tempted to keep these opal chandelier earrings whenever I make them, because they have so much character & personality going for them. 


Monday, September 1, 2014

How To Make Your Own Gold Metallic Jewelry Tattoos

If you've noticed, metallic 'jewelry' tattoos are 'in' right now. You can buy them, but I'd like to show you how to make your own!

Here's a set of tattoos currently for sale on Etsy... you can find them lots of places online and in shops...


Since I have a Silhouette Cutting System, I designed my own template.... I drew some squiggles in various thicknesses. You can draw anything... or you can even buy some pre-made designs from the Silhouette store for a small fee.


I sent it to the cutter and created my own templates.


I had a book of gold leaf- it's about $50 for a book of 25 leaves last time I checked....


And I used this acrylic liquid glue that came with my glitter tattoo set. You can also use the wonderful templates that come with the glitter tattoos, but I wanted to create my own...


Put on a thin layer of glue using the template as a guide, pressed tight against the skin...


And wait for the glue to dry clear- about 5 minutes. Sort of like using sizing and gold-leafing, but this time you're gold-leafing yourself! Use the sheet of leaf and keep it on the tissue paper so it's easier to handle, and press it into the sticky dried glue.


It will look messy...


But then just use the brush that comes with the tattoo kit or your own fan brush and brush away the excess gold leaf.


Voila!!!


In the end, my daughter wanted it to look like a bracelet, so we used the glue and drew a line around it so it would look like a bangle. Added some more gold leaf, and brushed off the excess.  I suppose you could also buy some less expensive silver or other leaf, to try different colors for less of an investment. Pretty cool, eh?


Wednesday, July 16, 2014

Pieces and Parts....

I've finally finished designing my first collection of jewelry for retail stores- yay!! And as I was designing, I tried to have certain thematic elements that repeated, in order to have some cohesiveness to my collection. This jewelry is called the Etruria Collection, and features pieces with small granules (or balls) of silver fused onto a base. The ancient Etruscans mastered this technique- sometimes using balls as small as a head of a pin!! (google 'Etruscan granulation' and be prepared to be wowed...) All my pieces are named for the ancient cities in the land of Etruria, which is now Italy.

So my pieces have a satisfying decorative quality that is at once ancient-feeling and modern in it's graphic appeal. Here're some new pieces soon available in my shop:


This Amina ring has a shank that is twisted and granulated. It 'matches' with many of the pieces because it has the same elements- the twisting and granulation you can also see in the top of the ring. 


I am also using this same ring shank (cut 1/3 as long, though!) in the bail for this Ravena Necklace. Again the granules pick up some of the same elements in the pendant.


And lastly, I am using the same ring shank, again 1/3 as long, as a toggle for this Galatia Bracelet, and all of my layered necklaces! The Ravena necklace above also has this toggle and the same element as a bail. All I do to make the toggle is solder on a jump ring to the underside of the section of ring shank. Voila! 

I am hoping that these small details will help unify the collection as well as underscore some of the design elements.

Wednesday, June 18, 2014

Batches and Batches of Work... and my Helper!

I recently sent a few pieces out to be cast for my wholesale line:
These are components and I sent them to a new caster, who I was very happy with, but... they don't finish the work. What does that mean? It means, the castings come back looking like this:


And what that ALSO means, is that I get to spend time cutting off sprues (little piece of metal on back leftover from casting process) and sanding the nubs down, removing any odd remnant from the casting process, and finishing.

In addition I also need to do any soldering to the pieces before finishing, so the process of this all has taken many hours since getting my pieces back. 


After the pieces are cleaned up a bit, sprues removed and soldering done, I dunk them in a chemical bath that darkens them. I prefer the oxidized look for my granulated pieces- it brings out the patterning more- you can look at the first photo above and then compare to the ones below and make up your own mind!


After blackening I give them a rinse in water.


I then use my tumbler (mass finishing) to help me finish the job. My 'helper' is amazing.... these green pyramids 'cut' the pieces and the result is an abrasion to the surface- but if you notice, only to what's at the surface.


Which works well for me because I want the granule patterning to stand out! Here they are with a matte finish.


Then they go back in for a shine!

I will be posting more pics of recent pieces to my Facebook page in the coming days and weeks- take a look:


Tuesday, May 13, 2014

I've been BUSY!!!!

Hello Folks! Lest you think I've been slacking off by watching game shows and eating bon-bons, I've been BUSY!!! I am launching my first wholesale line this summer, and just got my sample pieces back from the caster. Here's my loot:

I'm now midway through assembling my sample set in order to photograph for line sheets, so I can take my show out on the road and get orders with retail stores. I spent hours cleaning, soldering on bezels and findings, oxidizing, connecting, and setting stones. New pieces will be released soon- watch this space!!!


Those of you familiar with my work and blog know that I make a lot of spinner rings (see above pic). They sell well and are made with patterned silver with a spinning band of Australian opals. To be honest, to be able to wholesale these rings and get the price down so I can offer them at a low enough price, I looked into using lab opal 'stones' instead. You all know I love using natural stones, but honestly those lab opals are gosh darn pretty. And seeing how no one is going to retire on the the sale of these rings, why not try to find some measure of cost-savings that still is aesthetically equal to the original?

Sometimes an artist has to make these kind of judgement calls... it definitely tugs on my moral heartstrings, but I decided to try the lab opals out on some new earrings designs I just got back from the caster. And these pretty stones are 1/10th the cost of the natural stones. 


So this was the sample panel of lab opal colors I received from the manufacturer. Not a lot of naturalistic choices, are there? Still, I chose about 10 colors to try, and then did a sample panel of all of them:


I laid down 4 stones of each color, starting at the left with natural opal. My goal was to match the natural variations of the natural stones, so I was prepared to use a number of colors, mixed together to best emulate natural opal.


I decided on the above color combination. I would mix equal amounts of the above 4 colors, and set them in place to see how they compared:


The first thing I did was to prepare the earring- I used a black Sharpie to darken the inside track where the stones would be epoxied into place. Opals really look best against a dark background.


Then I randomly placed the stones, and compared the color variations and tones to a spinner ring made with natural opals. I was pretty happy with my combo!! They look is very similar.


And here are the finished earrings- stones epoxied in place and only needing earwires to complete! I am DEFINITELY making a pair of these for myself!


Thursday, April 10, 2014

Do you Mass Finish?

There are many 'helpers' to the busy metalsmith, a big one being the 'mass finisher'. If you're not familiar with the process of 'finishing', it can be a real chore and a real skill to be able to finish a piece of silver jewelry.... to achieve a good polish can take a lot of hand power- filing, sanding, polishing. And the way you go about this varies dependent on the metalsmith. 

I have always struggled with finishing/polishing because a) I'm so happy something is almost done that I'm lax to put the time in to finish it 'right', and b) I haven't had a good education in the art of finishing.

And, yes, it is an art!


So here comes mass finishing to the rescue!!!! Above you can see 2 tumblers. The one on the right is an antique Lortone tumbler, believe it or not, used by me and my Dad 35 years ago (when it was new) to tumble rocks to shininess- only took 4 weeks to achieve! We'd change the grit every week and this powerhorse would be constantly running for a month!

I don't use it anymore because the plastic liners on the spinning rods had long since worn off. You can see rubber debris in the bottom where I had put rubber bands around the barrel so they would have enough friction to move on the spinning rods, and everytime ultimately they got worn down to crumbs. 

So, I bought myself a replacement from Harbor Freight that actually fits 2 barrels- on the left. The idea is that you put the pieces to be polished in the barrel, and it spins on the spinning rods, in the process rubbing against some sort of media, thereby polishing by burnishing the metal surfaces.

There's a new type of tumbler that's called a vibratory tumbler- it essentially vibrates or shakes the contents, which results in the same outcome as these traditional rotary tumblers. They are also sold in many sizes- for bigger or smaller jobs. Something I'd like to upgrade to!


This media is an abrasive pyramid-shaped material that actually slightly scratches or grinds the surface of the metal ever-so-much. It is helpful to start with this media first, I've found because it lays an even foundation to the metal and produces a better surface in the end. There are rougher media available, too, but I like just a subtle, almost sand-blasted look that this type provides. There are many other types of media (even walnut shells!) that produce a variety of finishes, depending on what the metalsmith wants to achieve.

As the barrel spins with the metal and this media inside, as well as water and a dash of dish soap to make everything lubricated and hence rub together nicely, the media essentially 'scratches' the metal evenly. I let them tumble for an hour or two.


Then, out they come, all scratched up and ready to go into a final polish. The above media is a polished porcelain. There is also stainless steel 'shot', which is essentially doing the same thing- polishing, but I feel I get a better finish with this stuff... the various sizes and shapes are for getting into small spaces. The stainless steel mixed shape shot left a bit of an orange peel texture on my pieces. This porcelain stuff leaves a smoother finish, but requires several hours in the tumbler.

That's okay- it's 'working' while I do other tasks!


Here're a few pieces after coming out of the abrasive media... all of the essential shaping, filing, and sanding has been done beforehand. You can see they look sand-blasted, with a matte-white finish.


Here they are out of the polisher- definitely shinier! It is still impossible to get into all the little areas of granulated pieces such as these, but since I am going to have them oxidized and then re-polished, the parts the media can't reach will be dark anyway. But these are ready to go to the caster to be replicated as rings, pendants and earrings! Then they will be mass-finished again, and findings and stones will be added.

I am glad mass finishing exists- it's like my little helper!

Of course, there are lots of ways to polish and finish by hand, but that's a subject of another post! Here's an overview of finishing techniques:


Can't wait to see how these come back from the caster- check back here in 3-4 weeks!!