
I recently had posted about the 'trick' of making a spinner ring. This week I documented making one for a customer and thought I'd share. You can see the earlier post here:

First, I needed to make the inner band a size 8, so using my ring chart, and knowing I was using 22 ga. silver (which ran through the rolling mill, hence making it 23 gauge) I figured the length I needed, soldered it closed, and oxidized/buffed it to bring out the contrast of the texture. You can certainly use a thicker gauge! This is as thin as I would go, though. It's a nice lightweight band but is not flimsy or cheap.

I actually got some of the channel wire I use to inlay the opal cabochons casted, because that is the most time-consuming part of making these spinner rings. So I use a casting and my round ring-shank pliers to start bending it into a circle.

I'd recommend making the outer ring quite tight to the inner ring. You still want it to be able to spin around, but it should be no more than 1/2 mm or so airspace between the 2 rings. This insures you don't have to flare the inner ring too much to achieve a lock-down on the outer ring. It could take some time to achieve this- be patient, do lots of measuring, and don't be afraid to take a smidgen more out and re-solder!

Test it to be sure it spins around smoothly...

Next I darken the interior of the channel because opals look best on a dark background. I use a fine black Sharpie!

Ready for opals!

I use the inner ring to hold the channel ring while I epoxy in the stones. I mix the epoxy and do half the circumference of the ring at a time. I use a toothpick to apply the epoxy- too much looks messy. Then I let it cure overnight.
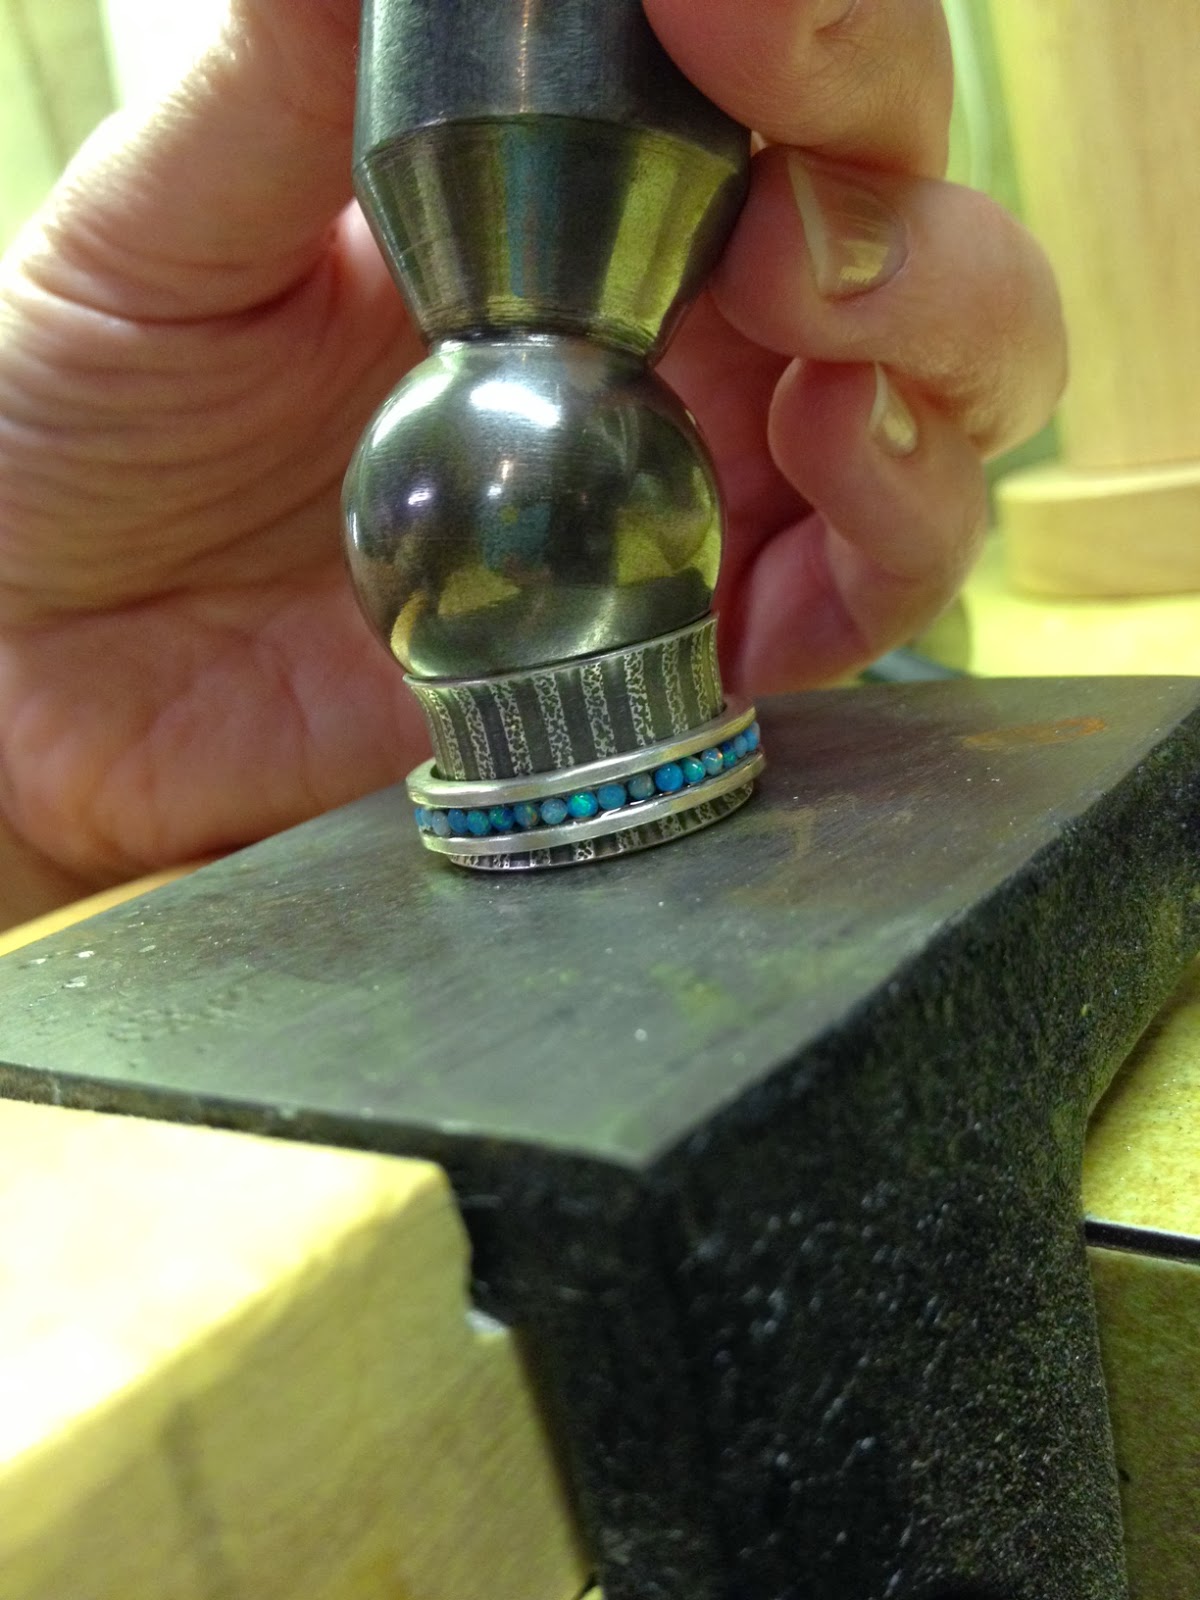
Finally, I flare one end with my dapping punch, put on the outer ring, and flare the other end to match. Voila- all done!!
Want one? Here's a link:
Well hey now, here's a spinner ring I'd like to try! I've made two types, one with flared ends (made by using a dapping dome thingy) and the other by adding "rails" to each end of the base ring. I love this idea with the stones! I always worry about glue or epoxy letting go down the road but I guess if the stones are really small like yours they should be fine! Thanks for a great tutorial....I'm going to post pictures when I try it and link you! :)
ReplyDeleteThese are beautiful and I missed out on the chance to buy your size 9 one! :( The one thing that's really frustrating to me is that many times mine become lopsided. I think I definitely need to take your advice and keep the outer band smaller so I don't have to flare it so much, but it can be really frustrating when they go wonky lopsided. Do you ever have this happen?
ReplyDeleteThanks all! Barb- I haven't had the problem you describe- what gauge metal are you using?
ReplyDeleteLove it! I came across your ring on Etsy and was wondering how do you set the stones... so now I know! Thank you!
ReplyDelete