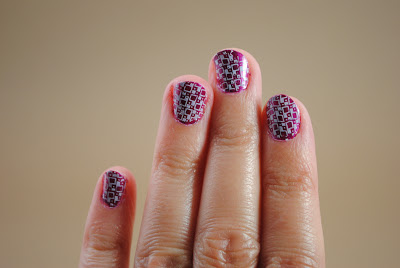
Don't my nails look pretty?
I bet you didn't know I was so talented when it came to painting my nails!
Boy, I must have teeny tiny little brushes to be able to pull this off, eh?
Okay, truth is, I'm a girl. And, I have 2 girls. So, we like to do our nails. A couple of summers ago, I was trolling Amazon.com and these cool nail plates came up. I immediately bought some because a) my girls and I like pretty designs on our nails b) they were made of stainless steel, so I imagined I could use these on metal to etch, since I already used nail polish as a resist, and c) couldn't I also put them through the rolling mill???
I'm always trying to think outside the box a bit, and when I came up with this idea of using the nail plates to etch on metal, I was pretty sure I had a great idea. I submitted my idea to Art Jewelry magazine, and they agreed. So I wrote an article about it and it was published in the May 2012 issue! Yay! 15 minutes of fame!!!
Here's a little short-cut instruction sheet (above) I put together for my students at the time. The article as published had A LOT more details- if you would like see the article as it was published, email me at danaevans68@verizon.net and I'll send you some pics!
But I think you can get a sense of how these plates work- transfer of images. That's how my nails looked so purty with little effort!! If you do a search on YouTube, you can find plenty of videos of girls showing how they use the nail plates to do their nails.
I used the same technique to create etched plates using some brass texture sheets I bought from Metalliferous in NYC. I used a rubber printer roller to transfer the nail polish from the brass plates to the copper sheets above so I could tackle a larger area.
Another tip that was included in the magazine was about using a laminator to attach PNP sheets to metal. This is a Scotch TL901 I bought on Amazon.com (I love Amazon) for about $30. It had great reviews. My kids also love the laminator, because really, everything looks better laminated, doesn't it?
I would place the piece of PNP to be attached face-down as usual on the metal, and then instead of ironing it, I'd run it through the laminator 8-10 times. The heat from the laminator would melt the toner on the PNP, and the rollers would create just enough pressure for it to stick to the metal. So easy!! Smaller pieces (such as above) could get stuck in the machine, so I'd simply run a piece of paper in first, then stick in my metal piece a few times while the paper was running through. I'd repeat until the metal went through a bunch of times and started to darken on the plastic side, same signs you look for when you're ironing.
I'd even use a piece of paper to catch the hot metal and run it back up to the top of the machine to be run though again- hands never touched it until it completely cooled and PNP was removed. You can see from above that it works great.
I'm yet to use my nail plates in the rolling mill.....


I saved the article in Art Jewelry, since you are so good at teaching via words and photos. This post is another great example of that! I love to see what you come up with, and thinking outside the box is a wonderful way to go through life.
ReplyDeleteThanks, Mary!!!!
ReplyDeleteWhat a great idea to use the laminating machine! Thanks for sharing!
ReplyDelete:) You're welcome! Thanks for reading!
ReplyDeleteIt is actually good design, excellent creative.
ReplyDeleteGray Laser Engraving