I had a general idea yesterday what stones I wanted to use, and generally what I wanted the earrings to look like. I wanted to use the combination of 4 little Australian opals, about 6mm each, with 2 hand-cut Montana agates. I love the combination of those 2 stones. The earthy and the ethereal. So yesterday I made all the bezels out of serrated fine silver bezel from Rio Grande. For earrings, I don't always like to use thick-walled bezels because it adds weight, and earrings should be kept light. I love the serrated bezels because of the nice edge detail they provide.
I wasn't happy with my first idea, so I sketched out an abstract leaf idea I had- with each opal contained in a leaf, which I thought would turn out really nice, and it also encorporated some leaf design wire I'd been meaning to use for a while... Happy with the sketch, I started creating some paper templates...
I traced out the Montana agate and created a larger-than-needed pattern- I planned to trim the sheet after I had done some granulation. The leaf or teardrop shape took some trial and error to get a size/shape I liked. Then everything was traced onto 22 ga. argentium silver.
I used a Sharpie to trace and then cut out the pieces with my jeweler's saw. I often will use 24 ga. for earrings to cut down on weight, but 22 ga. is visually a nicer weight, especially for pieces that have exposed edges.
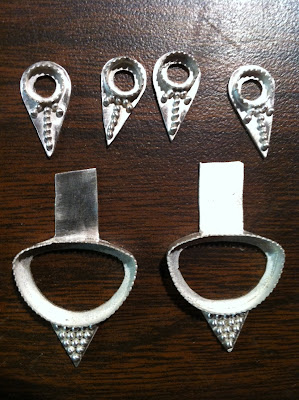
Next I used diluted (50/50) flux to attach my pre-made bezels and granulation pattern onto the elements. When designing a piece of jewelry, it's really important to visually think through each step, so the piece comes together as expected. I waited for the flux to dry completely then applied heat until the granules and bezels fused to the sheet below.
Here are the pieces granulated- only took one time and everything stuck! Yay! Next I cut out holes behind each of the opals and also the agates. Transparent stones look best with an open back, so I leave enough lip for the stones to sit on. Plus, it reduces the weight of the earrings by removing as much material as possible. I also trimmed around the bottom elements and filed and sanded the edges.
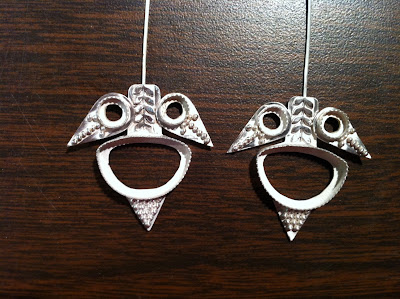
At this stage I am using solder to attach the leaf design wire to the middle stem, as well as the 2 leaf shapes to each side. Here it is fluxed and ready to heat up. I used spare pieces of silver to lift up the ends of the leaf elements so they'd lay flat when soldered.
I then soldered earwires to the back of each, and used a satin wheel to clean them up a bit.
I usually prefer my pieces that have any texture to them oxidized. Compare this photo to the one above it- and you can see the pattern better when the piece is blackened, and then the high points buffed off and shined up. It also takes on an antique or aged appearance which I like.
As luck would have it, a couple of balls did fall off from the bottom triangle of granulation while I was doing some buffing/polishing. Dang! I usually use a low-temperature solder (called Tix) to re-attach any wayward granules. I can even use it with stones nearby, because it melts at only 400 some degrees. Nice. Way better than 1600 degrees, which would have destroyed my solder bonds. And the color is a decent match to the silver. AND it's way better than epoxy and more durable too.
And here are the finished pair. The last step was folding over the earwire and hammering the bend slightly to harden it in order to keep it's shape. I also cut and filed the end of the wire. I was happy with them. Might be tempted to keep them for myself, too....


Dana,
ReplyDeleteThese are beautiful earrings. The stones are fabulous. Thank you for sharing the process as it helps a newbie like me understand what is involved.
Thanks, Vicki! Glad you enjoyed the step-by-step! ;) Dana
ReplyDeleteThank you! It's great! :)
ReplyDeleteUsing BullionVault you are able to acquire physical bullion bars at current exchange exchange rates.
ReplyDeleteOpen your free account now and get 4 g's in free silver as a joining bonus.