http://www.stoneaddictblog.blogspot.com/2015/01/trade-show-move-in-done.html

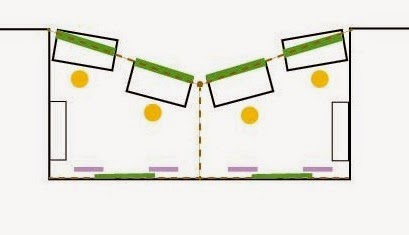
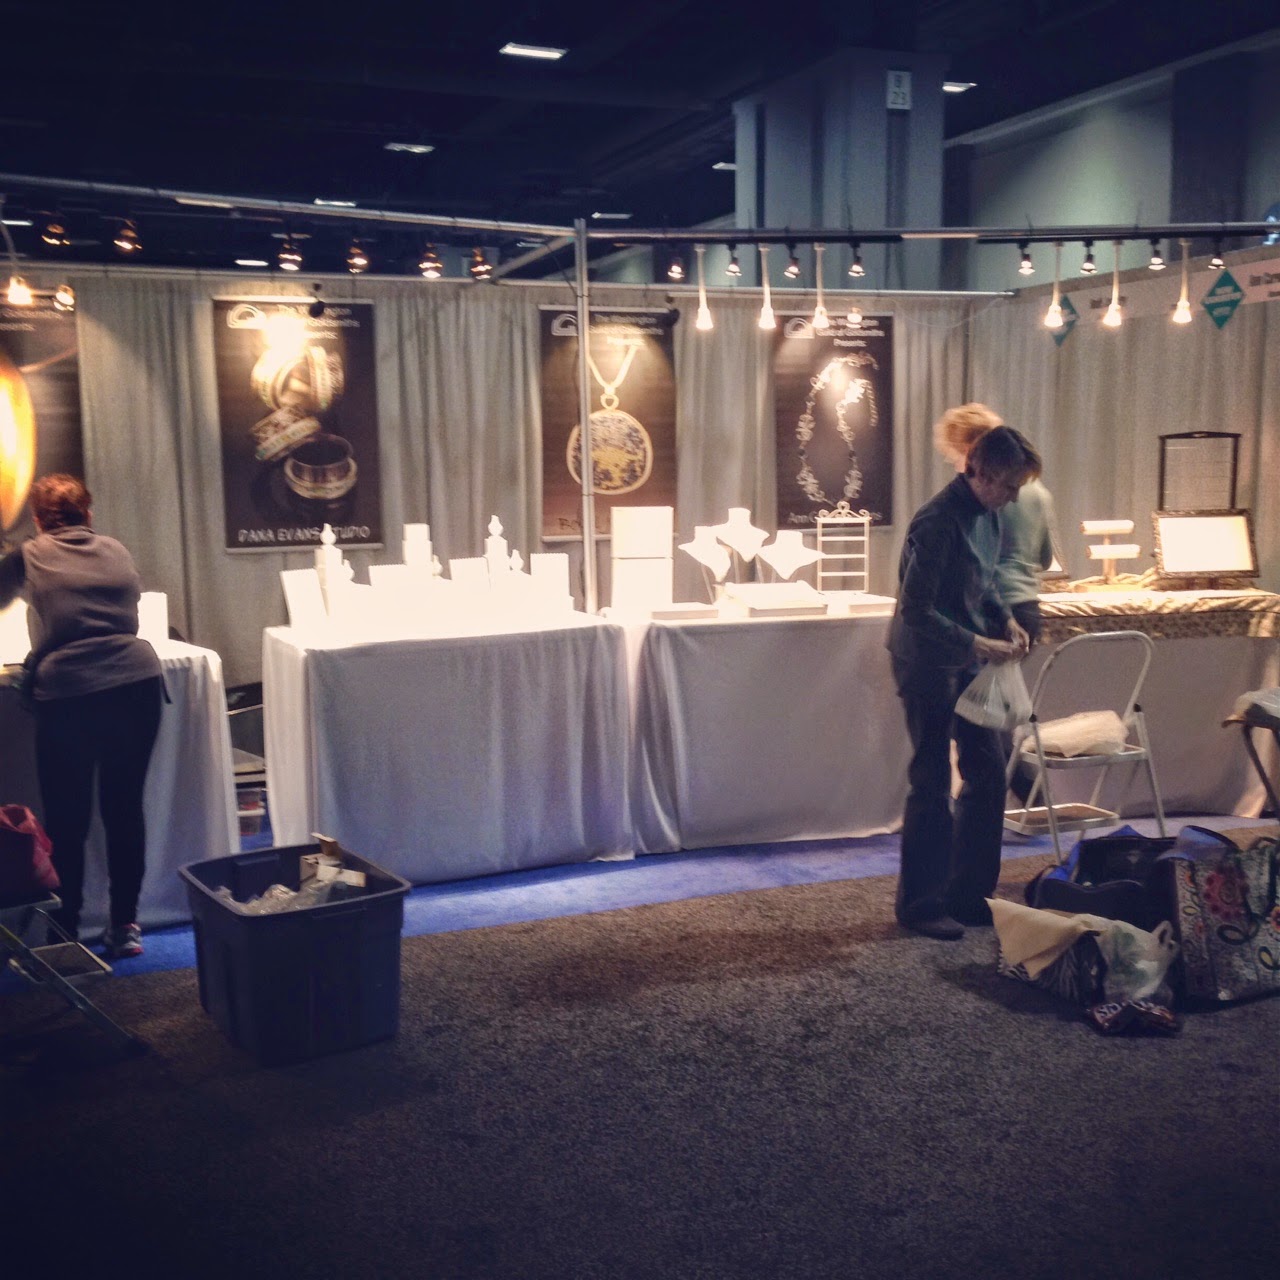
This is a snapshot from our booth. I was sharing a booth with 3 other people, also new to wholesale and trade shows, so that it would be less scary for all of us. We represented the Washington Guild of Goldsmiths (WGG) and we had a 10' deep by 20' long booth. Each of us had a 2'x4' table, which truthfully was not a lot of real estate. We met many times to discuss presenting a united booth, and I think we achieved that. However, even though the WGG name added some credibility to our booth, I do think there were 2 issues with sharing a booth: a) no strong identity for each one of us that our own booth would've provided, and b) buyers may have shied away from a group booth. Of course we have no way of knowing what goes through a buyer's mind, but it IS important to think like a buyer when thinking about booth layout.
Doing a trade show gave us the unique experience of talking with other vendors. Many feel like the $300 difference in buying a corner booth is well worth it. If I do another show, I will suck it up and likely buy my own booth, on a corner (perhaps next to a friend, though!) There were many artist vendors there by themselves, and unfortunately it did not seem like the show staff provided booth sitters. It is up to the artist to bring along a helper so that they may take breaks, get food, use the restroom, etc... and of course it's nice to have someone to talk to and help with setup/breakdown. The cost of a corner booth may cost $2500. Add that to airfare (if required) and hotel (if required) and you see how expensive it is to do these shows. We were fortunate to be local! The vendor next to us told us they spent $7000 to participate in this show. Which meant they needed to write $14,000 in orders just to break even. Fortunately they told us they make their living doing shows (wholesale + retail) so hopefully they did better than that. It was a slow show due to the change of city, name and date, so many vendors reported slow returns. This is part of why I may not have done as well as I could've.
There were over 200 jewelry vendors. Many of the buyers had a glazed look on their faces- that is a lot of jewelry to look though, and after a while, I imagine it all starts to look alike. Having a booth and a product that are memorable is very important! Anything a vendor can do to stand out certainly seemed to make a difference at this show. The vendor across from us was trained as a fine art photographer but now sells jewelry with cute cartoony/graphic animals and he does very well, makes his living by supplying 150 stores! I asked if he ever imagined he'd be doing this, and he shook his head no and laughed. But he's earning a nice living and has 3 employees, and has obviously found a niche that works. Another vendor told me there are 2 ways to go: you can sell what you love making, or you can discover what sells. I'd like to think that many can achieve both...
I had to really force myself to say hello to buyers (which wasn't too hard) and to tell them a bit about my jewelry. This was more challenging for me!!! I am not so good at talking about my work. But I was determined to try, so I practiced a line, "This collection is based on the technique of ancient Etruscan granulation." It did seem to interest buyers a bit more than just saying hi. If they took a few seconds to look, then I pointed out my best seller opal spinner ring and talked about that for a few more seconds. My impression was that buyers know pretty quick by looking at the items and the price points and decide to linger a bit more or move on. We overheard one buyer say, "I have to remember that I'm not buying for myself." Buyers are concentrating on what will work in their store and will sell.

I did have a good friend come visit and help me out and she thought my work was lovely, display was nice, etc... but felt my display needed a focal point. She suggested a one-of-a-kind stellar piece displayed prominently, because as it was, the display to her looked 'too even' and didn't catch enough of the buyer's attention in the first second or two they are making judgements about each artists' work. For a lawyer she made a really good point!!!! In my defense I did try to create a dynamic display with different levels so the eye would move around. I kept it simple so the jewelry would be the star. We raised our tables up but they could've been higher.
What we needed to have:
- postcards or business cards (preferably blank on the back so the buyer could write notes) with booth number in case they wanted to come back
- line sheets (we were told 100 but I only gave out a few!!!) with the booth number
- order forms preferably in duplicate so you can give the buyer a copy
- postcards with jewelry pictures on front and booth number on the back for our friends and loved ones to give out to potential buyers roaming the aisles
The nice thing about these shows is that the buyer's name, business, and city are listed on their badge for you to look at. So, if a store buyer comes by you're interested in talking to, you can put on your best.

Here's a look from behind my booth. It helps to have office supplies, cash, water, snacks, etc... and I was able to store stuff like that under my table. I also had a little tray table for putting my stuff on. I did bring a tall stool to sit on once in a while but it is better to stand. Standing next to the table or out in the aisle is also nice so there's not that distance between you and a buyer.
I talked with one of my stockists before the show and she told me she never even looks at a vendor unless they have a banner of their work hanging in their booth (pictures of jewelry and pictures of the jewelry on a model are both nice to have), the display is well-lit, and the prices are well-marked. I think we accomplished all of those items. She does this so that the vendor she sees have a certain minimum of professionalism. We were also in the back of the hall. Because it was a slow show, one vendor told me that the fact that she was in the front of the hall was her saving grace. So that's something to keep in mind too for future shows. Buyers get tired very easily and by the time they reached us in the back of the hall many looked like they wanted to pass on by us.
The banners I did- each of us had professional photographers snap the photos, then I overlaid text and sent them to VistaPrint. I also had to buy the poster hangers so they would lay nice. We had to provide all the lighting, and lighting the banners was just as important as lighting our jewelry. Track light kits were not expensive (a set and 4 lights $45) but we had to get a power pack that could be inserted into the end that had a plug. We had lots of extension cords and a couple of power strips for more outlets. We were capped at 1000 watts of electrical per 10'x10' booth, so we could have plenty of lights. In a typical 10'x10' booth, with typical 50 w bulbs, that means 20 lights per booth. It's a fine amount for most people.
Beyond this we had to provide a floor cover. The Rosen Group contracts with Hargrove (a show contractor) to provide aisle carpeting and other equipment, and Hargrove offers many services and products to exhibitors. We could've rented our displays and lighting from them, and they would've installed them for us (for a price!). As it was, we did pay them to install carpeting because we didn't know how to reasonably cover 200sf of flooring ourselves and for a reasonable cost.
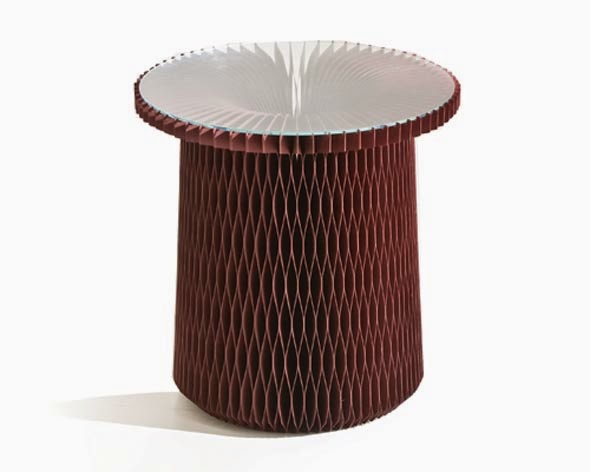
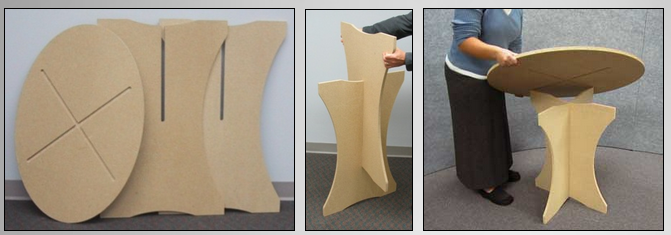
When it came to breakdown, we were able to get out fast. It is helpful to have a hand-truck, as well as pack in those recyclable grocery bags or even a rolling suitcase. We piled bag after bag over our shoulders, with my dad dragging a hand-truck with our tables, and walked right to our car for move-out! Didn't have to use the loading dock, which was a huge time-saver. Of course, the more intricate the booth, the more trips it would take. We did it in one trip!!!! Yay us! Some vendors creatively used cardboard or specialty folding accordion paper for tables, which were foldable, light, and packed up in no time:
It's a good thing jewelry is small, if we had been potters it would've taken much longer!
All of these items added up to an expensive show, and we didn't even pay full price for the booth, because as a guild we got a discount.
What I learned was that an artist may have to do a show several times before a buyer will decide to take a chance on ordering. The buyer needs to know that the artist is a serious and dedicated professional. It is important to have a cohesive collection so that a buyer can instantly size-up your work. Display is important, but it sometimes is a fine line between standing out because of your display and standing out because of your jewelry. Some of the busiest jewelers were the ones who just rolled out brown paper across a table, placed each of their items on it, and listed the price in pencil next to each. Other booths were dynamic and brought buyers in that way. We heard one buyer exclaim "If I see another circle I'm gonna throw up." Again, there's a fine line sometimes between being trendy and standing out. It's a risk to stand out too much and not follow trends! How do you know if you'll sell? On the other hand, if you're too trendy, you run the risk of looking like everyone else.
Such a balancing act, eh?
I'm looking forward to seeing where my journey takes me. I'm so glad I did this show. It was completely out of my comfort zone and I'm proud of myself for trying it. I'm sure I left out a lot of information we gleaned but this was the bulk of what I got out of it!! Thanks for reading!