
The last few months have been busy with building my wholesale business. I've had some good things happen- gotten into one of my 'dream' stores, and I signed up for the online wholesale site WholesaleCrafts.com. In the meantime, the holidays are coming up, and many retailers are pretty well-set with holiday merchandise. So my marketing efforts have slowed down a bit, and I'm preparing for my first trade show in January, as well as building my inventory of one-of-a-kind pieces to sell myself for the holiday season.
I always love making multi-gem earrings. The challenge in them, especially for earrings, is to make them well-balanced in terms of color (esp. true for opals), and making them exactly the same. I think this pair succeeds pretty well, but I'll walk you through the process so you can see the highs and lows of what went into making them....
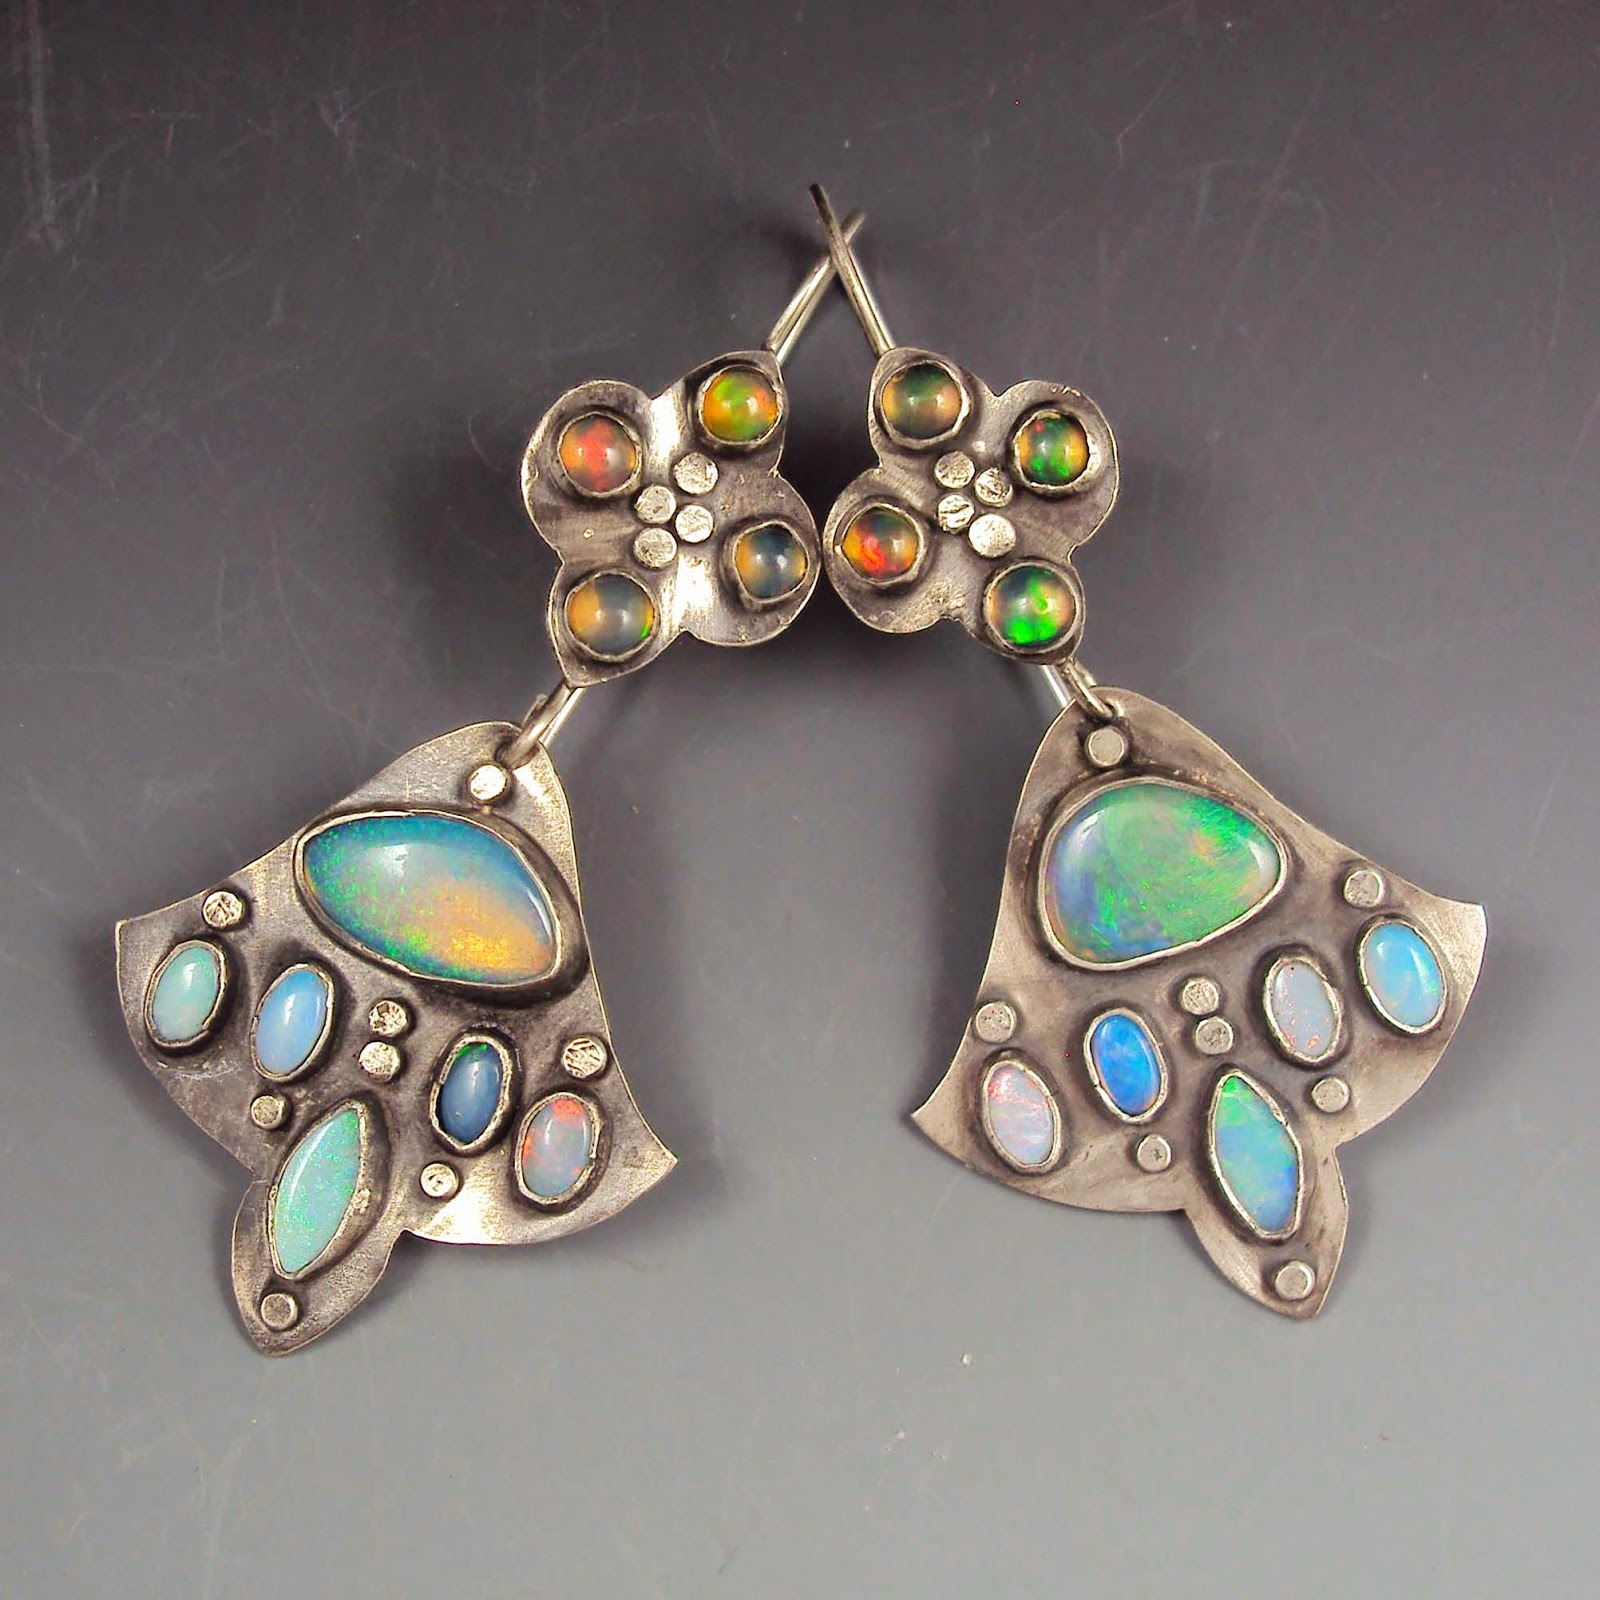
This pair followed my typical multi-gem structure: a smaller piece at the top which is soldered onto the earwire, from which hangs a larger piece or pieces below.
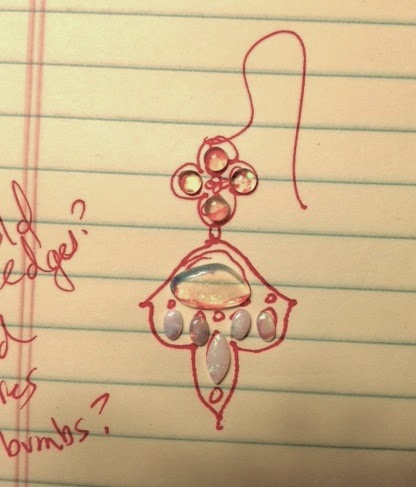
I only did a couple of sketches before I was happy with the combination and composition. Since I already had a good idea of which stones I wanted to use, it was mostly the bottom piece that I needed to design. I love using all my little stones- I can't even remember where I bought many of these small stones- probably in a mixed-stone packet. I tried to use up as many regularly-sized shapes and intersperse other combinations. I successfully cleared out 3 categories of stones- so it was a good way to use them up!
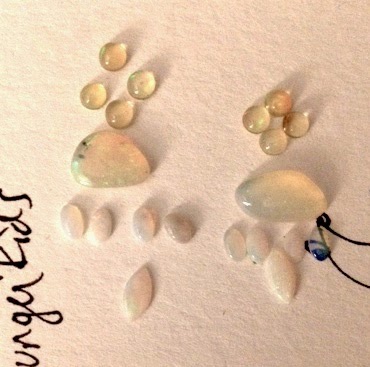
Here are the stones I took out to use- the 2 large stones were the most alike of that size in terms of color and shape. I was able to use up all 8 oval cabochons I had as well as the 2 matching marquis stones. The 2 sets of 4 stones at the top were part of a parcel of many stones in which these stones were markedly darker/warmer in body color. I thought they'd contrast nicely with the cooler/whiter collection of other stones. Of course, if you notice, when you put opals on top of white, there's not a lot of color or fire visible. That's why a lot of settings are darkened before the opals are set- the darkness shows off the color and fire much better than white.
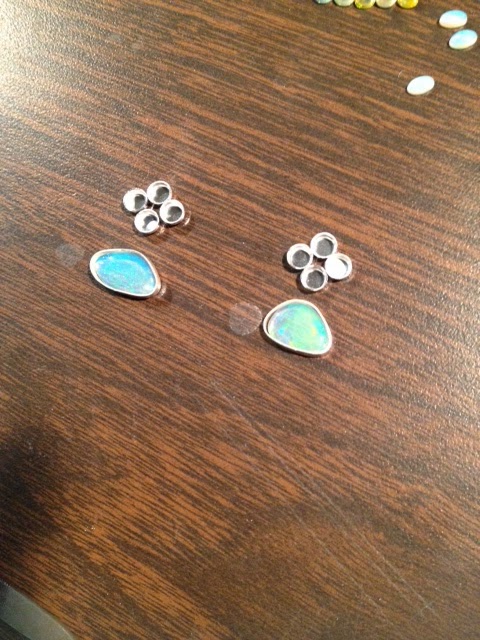
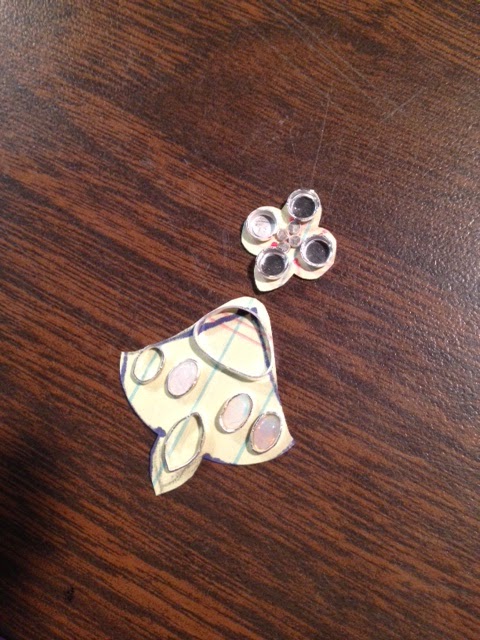
I used pre-made bezel cups for the round stones at top. Then I made the bezels for the 2 largest stones.

Since I had 8 oval stones to bezel-set, I measured one and copied the measurements to the remaining 7 lengths required. Saves time to batch-make bezels.

I lined up the ends of each length of bezel wire, straight on. I never solder bezel ends together unless they meet face on- that's why these are D-shaped. The straight edge is where the seam is. I put a small piece of solder under each seam, fluxed and heated until the solder flowed, then I pickled, dried, and formed the shapes into ovals to match the stones' shape.

Next the marquis-shaped bezels were made, and now all are complete- whew!
Once the bezels are made, I can then create a template for which to cut out sheet silver to create the base of each piece. It's important to create the bezels first so I can create templates that are exactly the size I need. I fold the paper in half and cut, so as to create a perfectly symmetrical pattern. I made a few before I was happy with how the stones were placed in the space.

The next part was more straightforward- I traced the pattern onto silver, cut out and sanded the pieces, then laid out the bezels and decorative coins (hammered granules) so that the pieces matched as well as possible. I fused them since this was Argentium, soldered the earwire to the back of the top piece, pickled, oxidized, and buffed.
Then the stone-setting! This is a nerve-wracking part of the process for me, especially with so many stones to set- 20!
I got in the groove and kept hammering and hammering... difficulties arose, as they often do. One of the larger stones didn't fit well into its bezel after fusing, so I had to grind it down a bit on one edge. Then, one of the bezels got a little distorted and it was hard to hammer it back into a decent shape. Another stone didn't sit as flat in it's setting, especially as I was hammering it lightly closed. And, because sometimes I tend to rush too much to get to the finish line, I didn't necessarily spend enough time fine-tuning my settings before stone setting. You people who read my blog regularly know I have my faults!!!!!
Setting stones so small in bezels is challenging- also because they are close together. Clearances are tight. It's also more challenging to clean them up afterward. And because the stones are small and thin, closing bezels always makes me afraid of cracking a stone.
In the end, they may not be perfect, but they have gorgeous stones, great design, and will last a long time in someone's jewelry box! I am ALWAYS tempted to keep these opal chandelier earrings whenever I make them, because they have so much character & personality going for them.
