Tuesday, July 30, 2013

New Work to be Cast....

So I found another caster that was recommended and they charge 1/4 of the cost of the last casting house I used. I am going to send a few things their way to see how they do! I was not happy with the molds created last time, and I'm hoping that now that I know more about the process, I will better be able to work with them on getting the results I want. Plus, they were so expensive that I couldn't get my costs down to where I wanted them for a lower-cost alternative to one-of-a-kind pieces I make. 


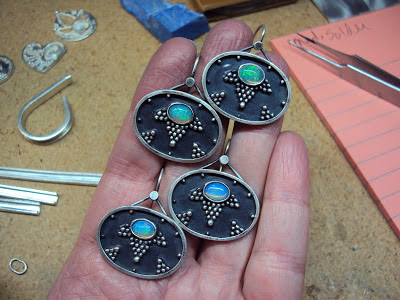
Here's some earrings I saw online- they influenced the design on the earrings below:


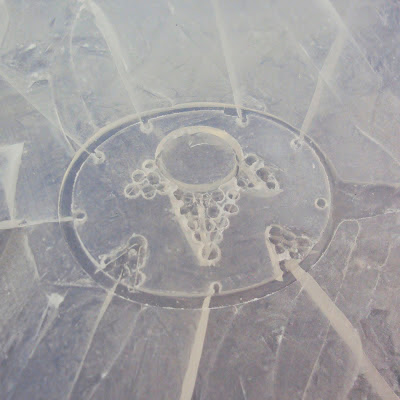
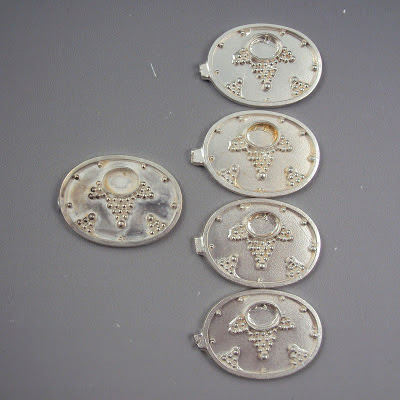
Yes, I love that onion-dome-like shape. Very exotic. So this was an experiment: I sawed-out the design and fused it to a backplate using Argentium silver, of course. Then I granulated in the recesses. I kind of like how it came out! Kind of different! So this is one of the pieces I will send them to see how they do with this level of detail.


I will then be able to easily solder on a earwire on the back, as well as some bezels to hold any number of different stone combinations.


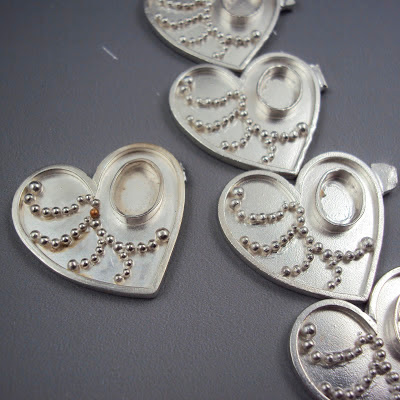
And here are a few more earrings designs I'll be working on in the next few weeks, also to send to the caster for a less expensive line of jewelry that will increase my inventory. I'm hoping to approach some stores this year to carry my items!

Some of these could also be turned into pendants, and even rings. But I have some wax experiments I'd like to do this Fall too, so that will be an interesting exploration. I am hoping that casting will be a great solution to creating a reasonably-priced collection of well-designed pieces, using the same high-quality stones I've always used. I'm excited to explore the possibilities!


Tuesday, July 23, 2013

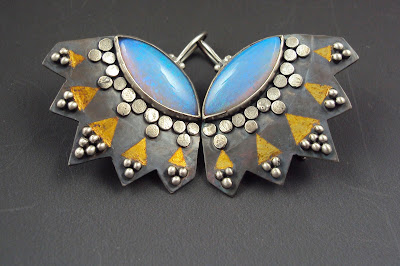
Latest Piece: Granulation + Keum Boo

I have been wanting to combine the techniques of granulation and keum boo. I love both, and they both add such great texture, shine, detail and pattern to jewelry pieces. I had 2 marquis-shaped opals, bought separately but very close in size and color, that I've long wanted to use, and had thought up a design plan recently....


I wanted to create a template, since that usually results in a better product- more uniform, even, and polished-looking. Even better, I used Illustrator to measure the exact size of the stones I'm using so the template was more accurate. Even though I like to plan things out, things happen during the construction process that I'm open to, and sometimes I make changes. More often, it's about leaving the interpretation of a sketch open to variations, depending on how the design process goes. I like having a plan, but I also like having the opportunity to 'see how things go'.


Happy with the template, I cut it out from cardstock and traced it onto 24 ga. Argentium, since I'd be granulating. I cut, filed, and sanded my base sheets.


I first created the bezels and fused them onto the base sheet. I then decided to use the 'coins' at the top, since they are lower and wouldn't obstruct the bending of the bezel walls while setting the stones. I liked that the 2 rows of granulation were different but the same- one row with granules, one with coins, but they mirrored each other nonetheless. Above is a pic of them once they were fused to the base sheet.


Next I created the earwires and soldered them onto the back.


Here I folded the earwires and created a notch of wire on the back of the earrings for security. I then plopped them in the tumbler with fine abrasive to smooth them out and give them more of a surface for the keum boo to stick to. This was an experiment; usually I fuse the gold foil on a more polished surface. 


Next the keum boo process: cutting out the triangles of gold foil, placing them, burnishing them down while on the hotplate. It was challenging to burnish so close to the granules. Next time I'll leave more space. I then dipped the pieces in liver of sulfur. I think the fine abrasive texture helped to create a darker patina. I then buffed the high points of the granules and coins with my blue satin 3M disk.


I set the stones and compared the finished product to the sketch. Not exactly the same but similar in spirit and the design idea is still there, even if the execution allowed some variation.


Every piece I make is an experiment of sorts. Sometimes I have questions when I finish. Should I have polished the earrings more? Sanded down the coins so they were smoother? I like creating modern pieces that are inspired by antiquity. Are they too much antiquey and not modern enough? Would they look more modern if they were polished? Should I have used another layer of gold foil? Should I have oxidized them less? 

Next go around with a similar piece I will try polishing more, adding a second layer of gold, and oxidizing a bit less to see if I can add some better finishing touches.


More of My Favorite Things...

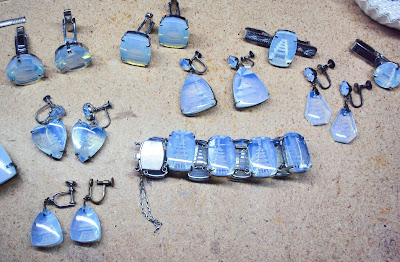
Lately another item has me in 'acquisition mode'. They are Japanese reverse-carved glass jewelry. Most of them are clear, or, my favorite- bluish transparent glass. Rarely you can also find red or black, but these are my faves probably because they remind me of opal or moonstone. They have a mysterious aura to them, too....

They come in different forms- bracelet, earrings, rings, cufflinks, tie bars, pendants. But what they have in common are the color of the glass, and the time period they come from- early to mid 20th century. They were essentially tourist trinkets, and many came with holes drilled for earrings or hanging pendants. I try to buy the ones without holes. They are not too expensive, although some sellers try to get away with charging more than anyone would pay. I've paid anywhere from $10-$25 a piece. 


Most are reverse-carved pagodas. Let's face it, Japan is known for it's pagodas, among other things. And it's a perfect souvenir for a tourist to take home- their own personal pagoda and reminder of their travels to Japan!


You can see how cool they look- like these floating 3-D forms in glass. They are fairly deep, too, which heightens the effect.


Here's an unusual find- a reverse carved shipping boat.


Here's a closer look at the backs- you can see how they are carved on the reverse side to create the effect. 

So what am I going to do with them, you ask? Good question! My intent was to remove them from their settings, and re-set in a new creative way. Not sure how yet! Will I be ruining their value? Probably. But since I didn't pay much for them, I don't think it'll be a major loss.


This is one idea I had- recognize the center piece? It's a micro-mosaic! I love how this was set in a modern, art deco style. I was thinking about setting the pagoda pieces similarly. I'll let you know when I come up with something!


Thursday, July 18, 2013

Some of my Favorite Things...

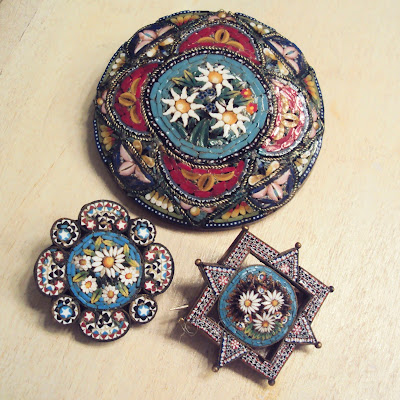
I'll admit it- I was born with a 'collector' gene. First rocks, then coins, stamps, and various other smaller collections of stickers, crafts supplies, shells, etc... As an adult, I try to reign in my collector gene, but at times it overwhelms me and I can't help myself. Ebay is NOT my friend. I remember the early days of Ebay when you actually had to communicate with the seller to figure out payment, shipping, etc... Well lately I've been dabbling in the collection of these old Italian micro-mosaics. Probably because I love doing my own seed-beed mosaics, I look to these for inspiration and amazement. Of course, some are more collectable than others....

These were some of the first ones I bought. The lower ones are about the size of a quarter. You can see I loved the daisy theme with the blue background. The piece on the front right has the smallest little pieces- it's amazing.


 I also couldn't resist this bracelet of rectangular panels. It's a bit big, but yes, I've worn it!


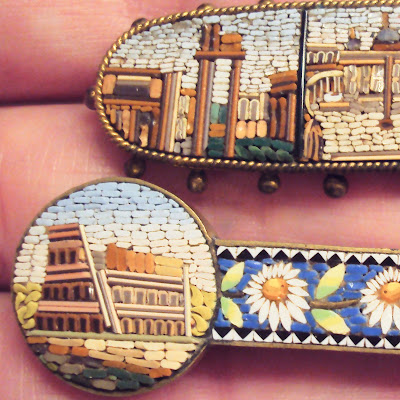
The bracelet even has a 'Roma' tile- Rome. To be honest, these were made for the tourist trade in Italy. You can find some cheapo micro-mosaics for $20 or even less. The most artistic micro-mosaics were of specific scenes, whereas these are more decorative, and not very expensive.


The middle piece here of course drew me in doubly- one for the daisy theme in the center, and another for the amazing architectural scenes on either side. The top piece has more of those architectural scenes. This style was known as 'Tour of Italy' for obvious reasons, and the prices were a step above the other more common micro-mosaics. Some pieces were even set in gold and sell for thousands of dollars, some tens of thousands. 


While not museum quality, these 'Tour of Italy' pieces certainly are mighty appealing to a lot of collectors, and fetch prices in the 100's per piece. I like to think of them as the 'mid-range' as the museum-quality pieces are certainly out of my budget!

If you're interested in seeing more, consider these books (another investment- I hope to own them one day!)

http://www.amazon.com/Micromosaics-Collection-Jeanette-Hanisee-Gabriel/dp/0856675113/ref=sr_1_2?ie=UTF8&qid=1374170158&sr=8-2&keywords=micro+mosaics

http://www.amazon.com/Roman-Micromosaic-Roberto-Grieco/dp/8849213905/ref=pd_sim_sbs_b_1


Tuesday, July 9, 2013

Update on Casting....


So today I called the caster I used to ask him about the issues with my castings. The powdery substance on the mold was parting powder. Which in most instances is not a problem, but with granulated surfaces, more powder is not good for definition. But the problem comes in removing the model from the mold and not tearing it- there has to be powder. And from what he said, that was probably the best mold material to use (non-shrink silicone). So, just part of the process.  But, I chatted with another caster from my Metalsmiths Unite II group on Facebook and he says that could be remedied by using a silicone spray instead of casting powder next time.

The orange-peel texture was from the freshly-casted pieces being put into the magnetic tumbler for a few minutes, with stainless steel pins/needles. It does a GREAT job cleaning out all the investment debris, but also leaves that texture. It also removes the gray casting skin. The caster said he can not do that in the future if I so wish. However, when I talked to my caster contact on FB, he doubted the texture was formed by this, or by the metal cooling, which the caster also said could cause the texture. He thinks it was caused by the mold having this texture, because if the mold-making is good, it can pick up fingerprints! So maybe the molding effort was the weak point in the company I used.

I am going to try another company or two, get estimates, and see what my best options are. I suppose every caster has elements in their production which are weak links. One jewelry friend said her caster didn't make the best waxes. 

Another thought is maybe I could eventually look into doing mold-making and waxes myself. It certainly would cut certain steps out of the process, save me money in the long run, and give me some control to the process. Time will tell.... in the meantime, I need to find a caster who is good and doesn't charge a lot, because the company I used was quite expensive. It makes it harder to create a lower-cost line of jewelry. Stay tuned.....

Monday, July 8, 2013

Castings Cleaned Up and Finished...

So excited to get my castings back (minus my favorite one!), today I spent time cleaning them and finishing them as I had envisioned.....


Here you see the original to the left, and the castings/copies to the right. They look from the untrained eye very much alike. The first thing I did was saw off the sprue from each casting.


Next, I fabricated the earwires and soldered them onto the back of each earring component. I also dipped them in an oxidizing/blackening agent.


I sanded the tops to create the contrast between the higher granulated areas and the flat areas.


I set the stones and folded the earwires- fini!


I like the look of them, and it took a lot less time to produce these than if I had hand-granulated them. This allows me to offer them at a lower price accordingly.


These were also casted- in order to make heart-shaped rings with a choice of different 7x5 stones, same size and shape as the stones in the earrings.


I followed the same steps and created a model which I photographed for my Etsy listing. The ring shank is not soldered on, to allow for a customer to tell me what size they'd like. I attached it to the heart component with museum putty. I also didn't set the stone yet- after the customer orders a ring and I finish and solder on the shank, I will set the stone and then mail it out.


Now you see where all these 7x5 opals are going!

Tomorrow I am calling the casting company to find out why the castings had an orange-peel texture, and also what the powdery residue was that was on them and was unfortunately molded. The company I used was also quite expensive; I may try another company recommended by a jewelry friend. More updates later.....!

Friday, July 5, 2013

Castings Have Come Back!

3 weeks ago I sent my items to the caster to be cast into multiples. And today they came back! So excited to see what's possible!

This is what the original or 'model' was cast in- non-shrink silicone. It's very flexible. My son liked smooshing it! The 2 halves fit together because of some unusual shaped ridges. I don't know how they did that!


Here's a closer view. I was impressed with how the mold was able to capture some of the under-cutting of the granules.


The original is on the left, the copies on the right. Pretty nice! They are unfinished, I still need to abrade/clean the surface and polish them. 


A sprue was soldered to the original model and then it was cleaned up, but my feeling was maybe not well-enough. I can see some residue still present in the original, that seems to have been casted in the copies. You can see that especially inside the bezel.


Another piece I had casted.


Again you can see some residue inside the bezel that was casted in the copies. Also, the surface of the castings has sort of an orange-peel texture.

I will be putting them in my tumbler with abrasive media in order to smooth out the surface. Then they'll be polished.


This one didn't make it through the sprue-soldering and ultrasonic cleaning operation- granules came off in the process. Dang- back to fusing! And it was my favorite one!